The White label section allows white labelled accounts to setup the white label for their domain name, tweak branding settings, set app branding, and Other Settings. Let us take a look at how these settings are white labelled.
TRYB Loyalty > Left-Hand Menu > Settings
Follow the above-mentioned workflow to land on the Settings screen.
From the tabs listed atop the screen, click White Label.

White Label
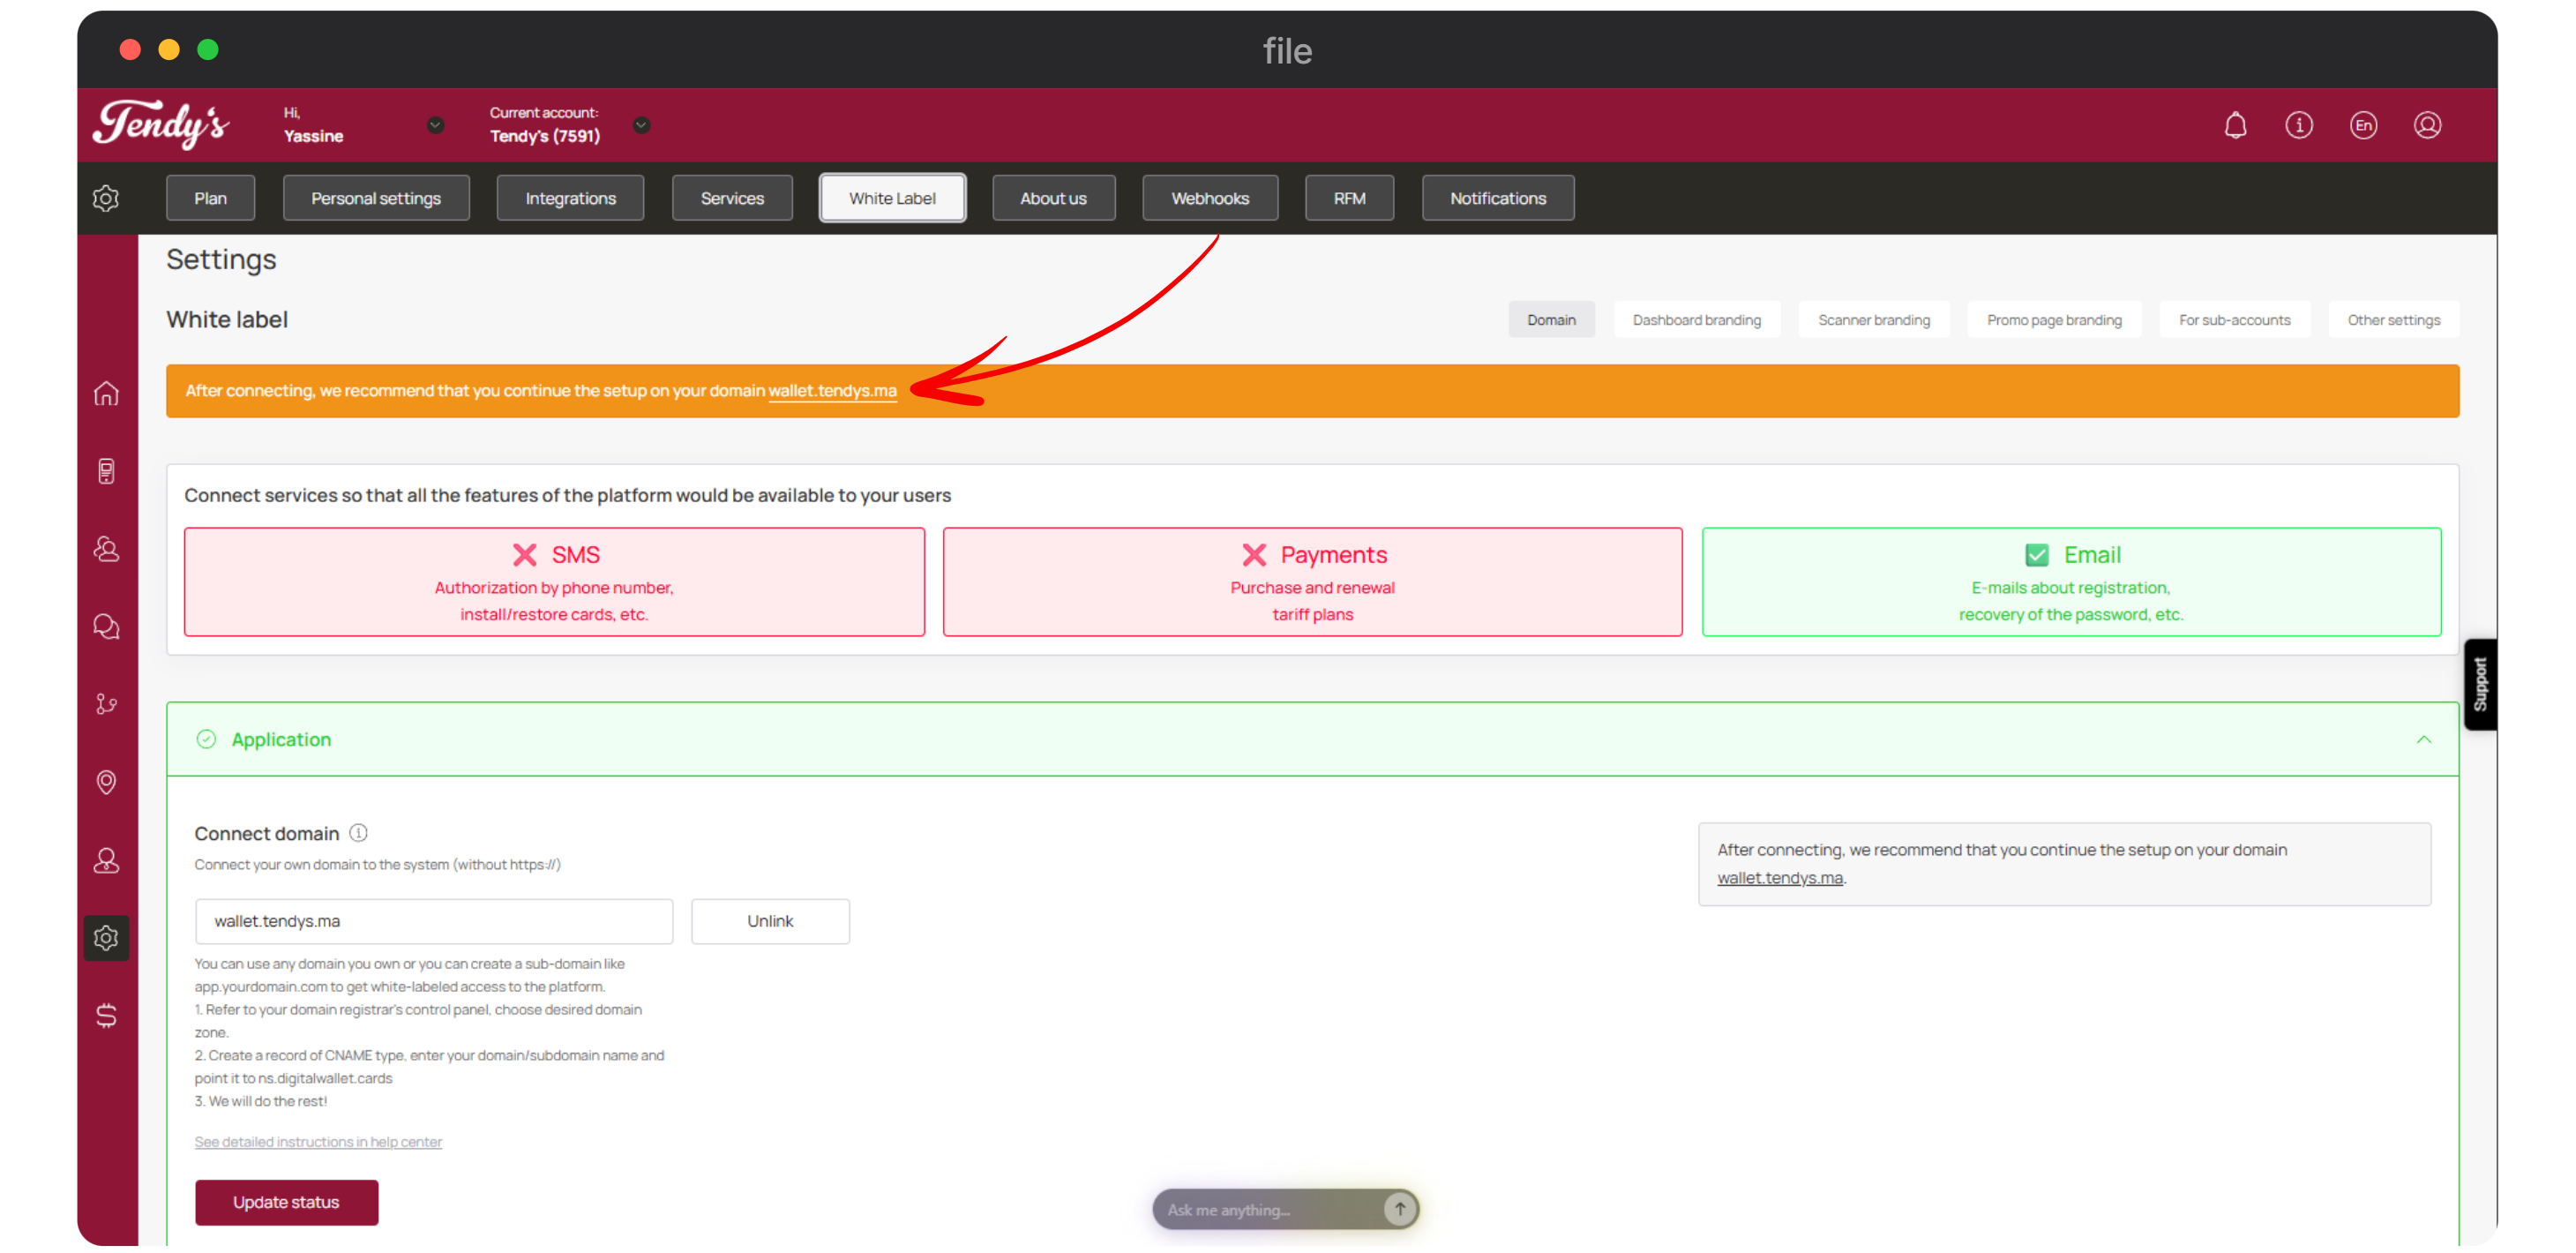
Here, navigate to the Connect Domain heading.
Enter your domain name as per your domain register in the domain name field. It is advised to follow the app.[subdomainname] format.
Once entered, click the Link button.
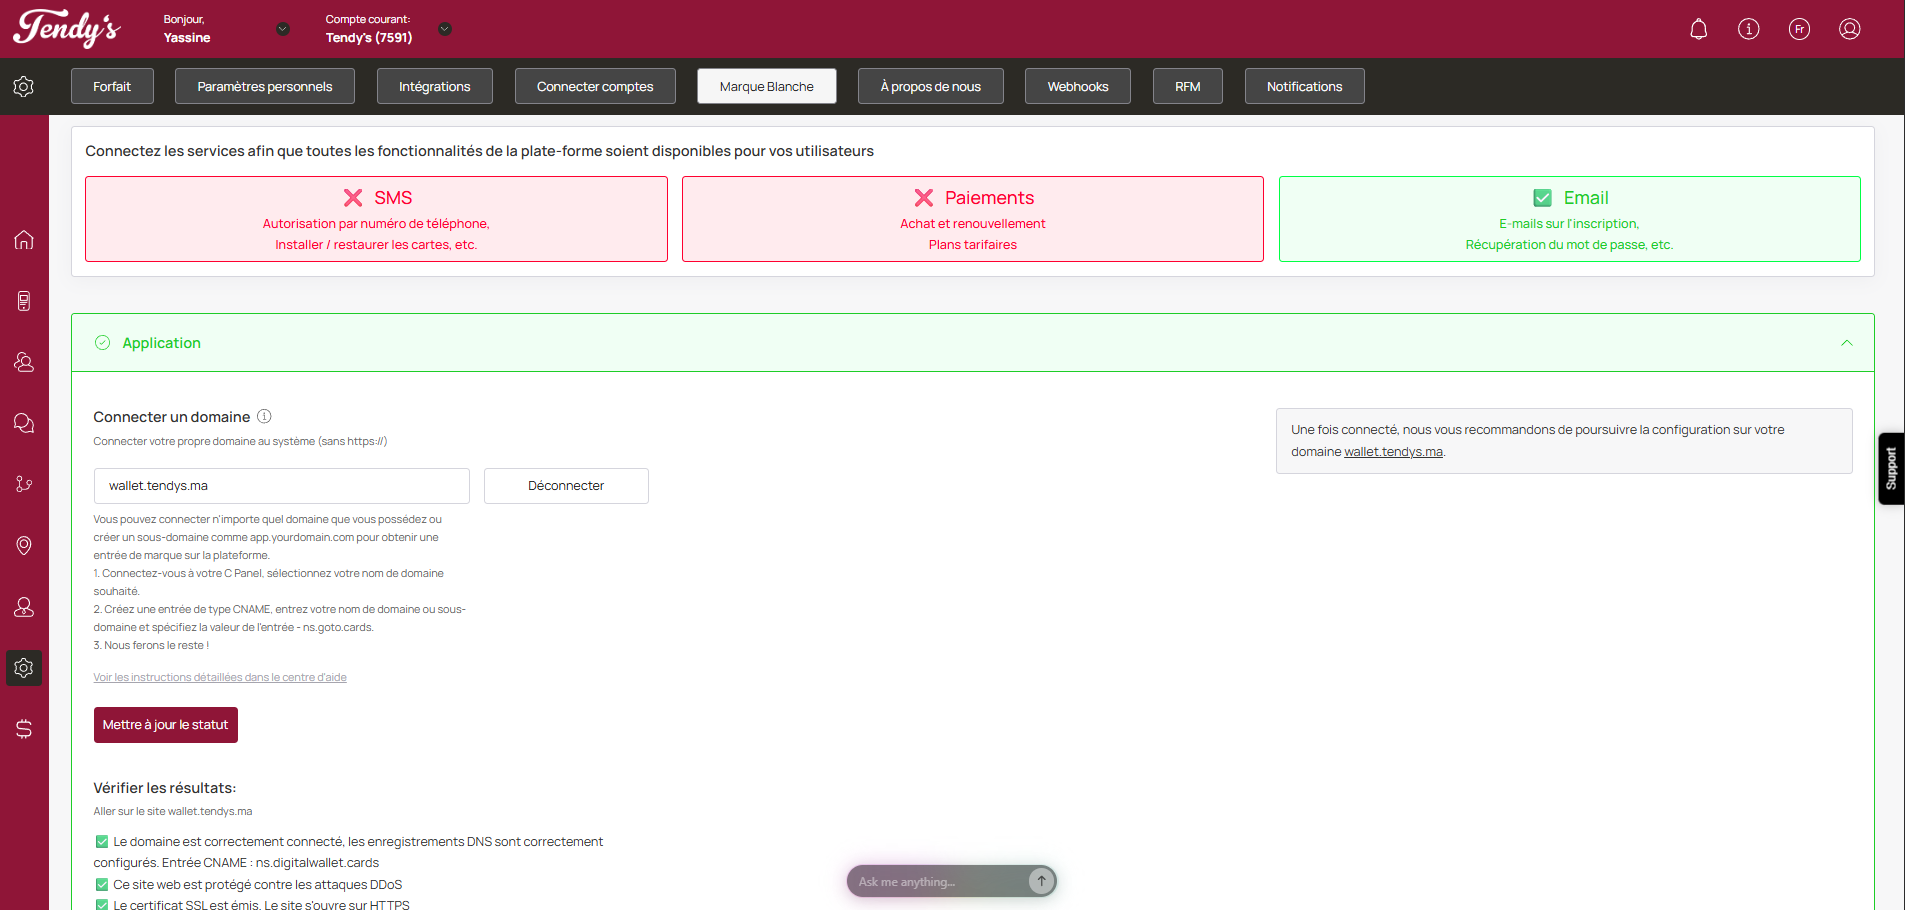
Link Domain
You can also see the detailed guide by clicking the See detailed instructions in help center hyperlink.
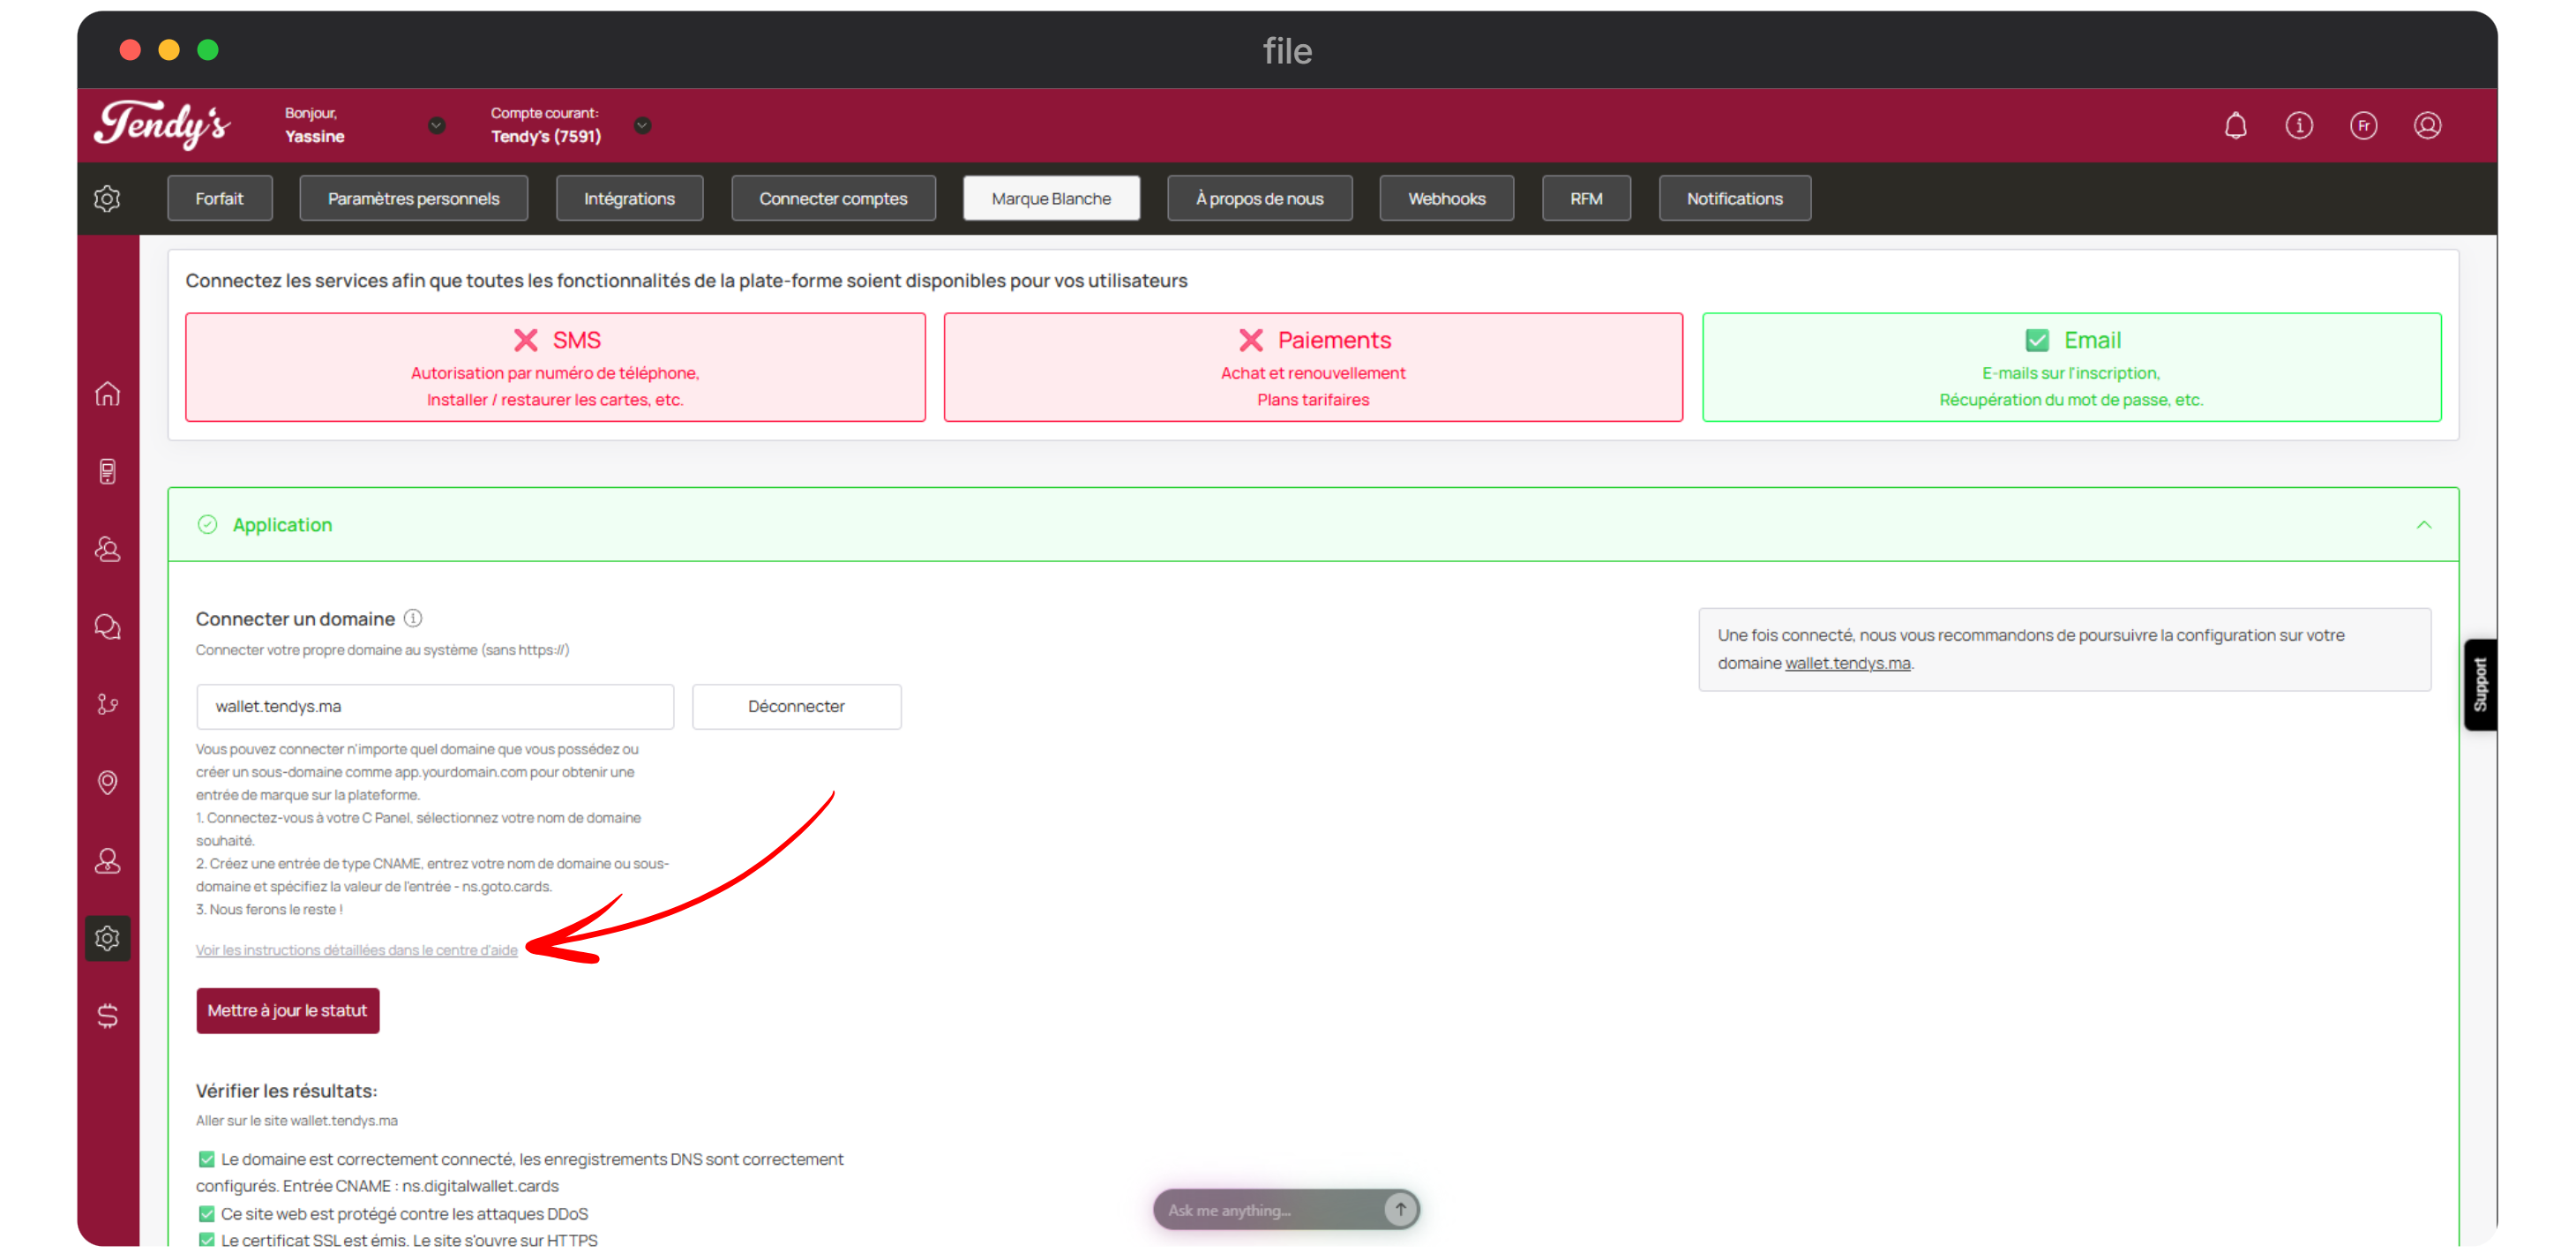
See Detailed Instructions
Once you are done, click the Update Status button. ✅ Please note that issuing an SSL certificate can take anywhere from 15 minutes to 24 hours. We cannot speed up this process; You simply need to wait.
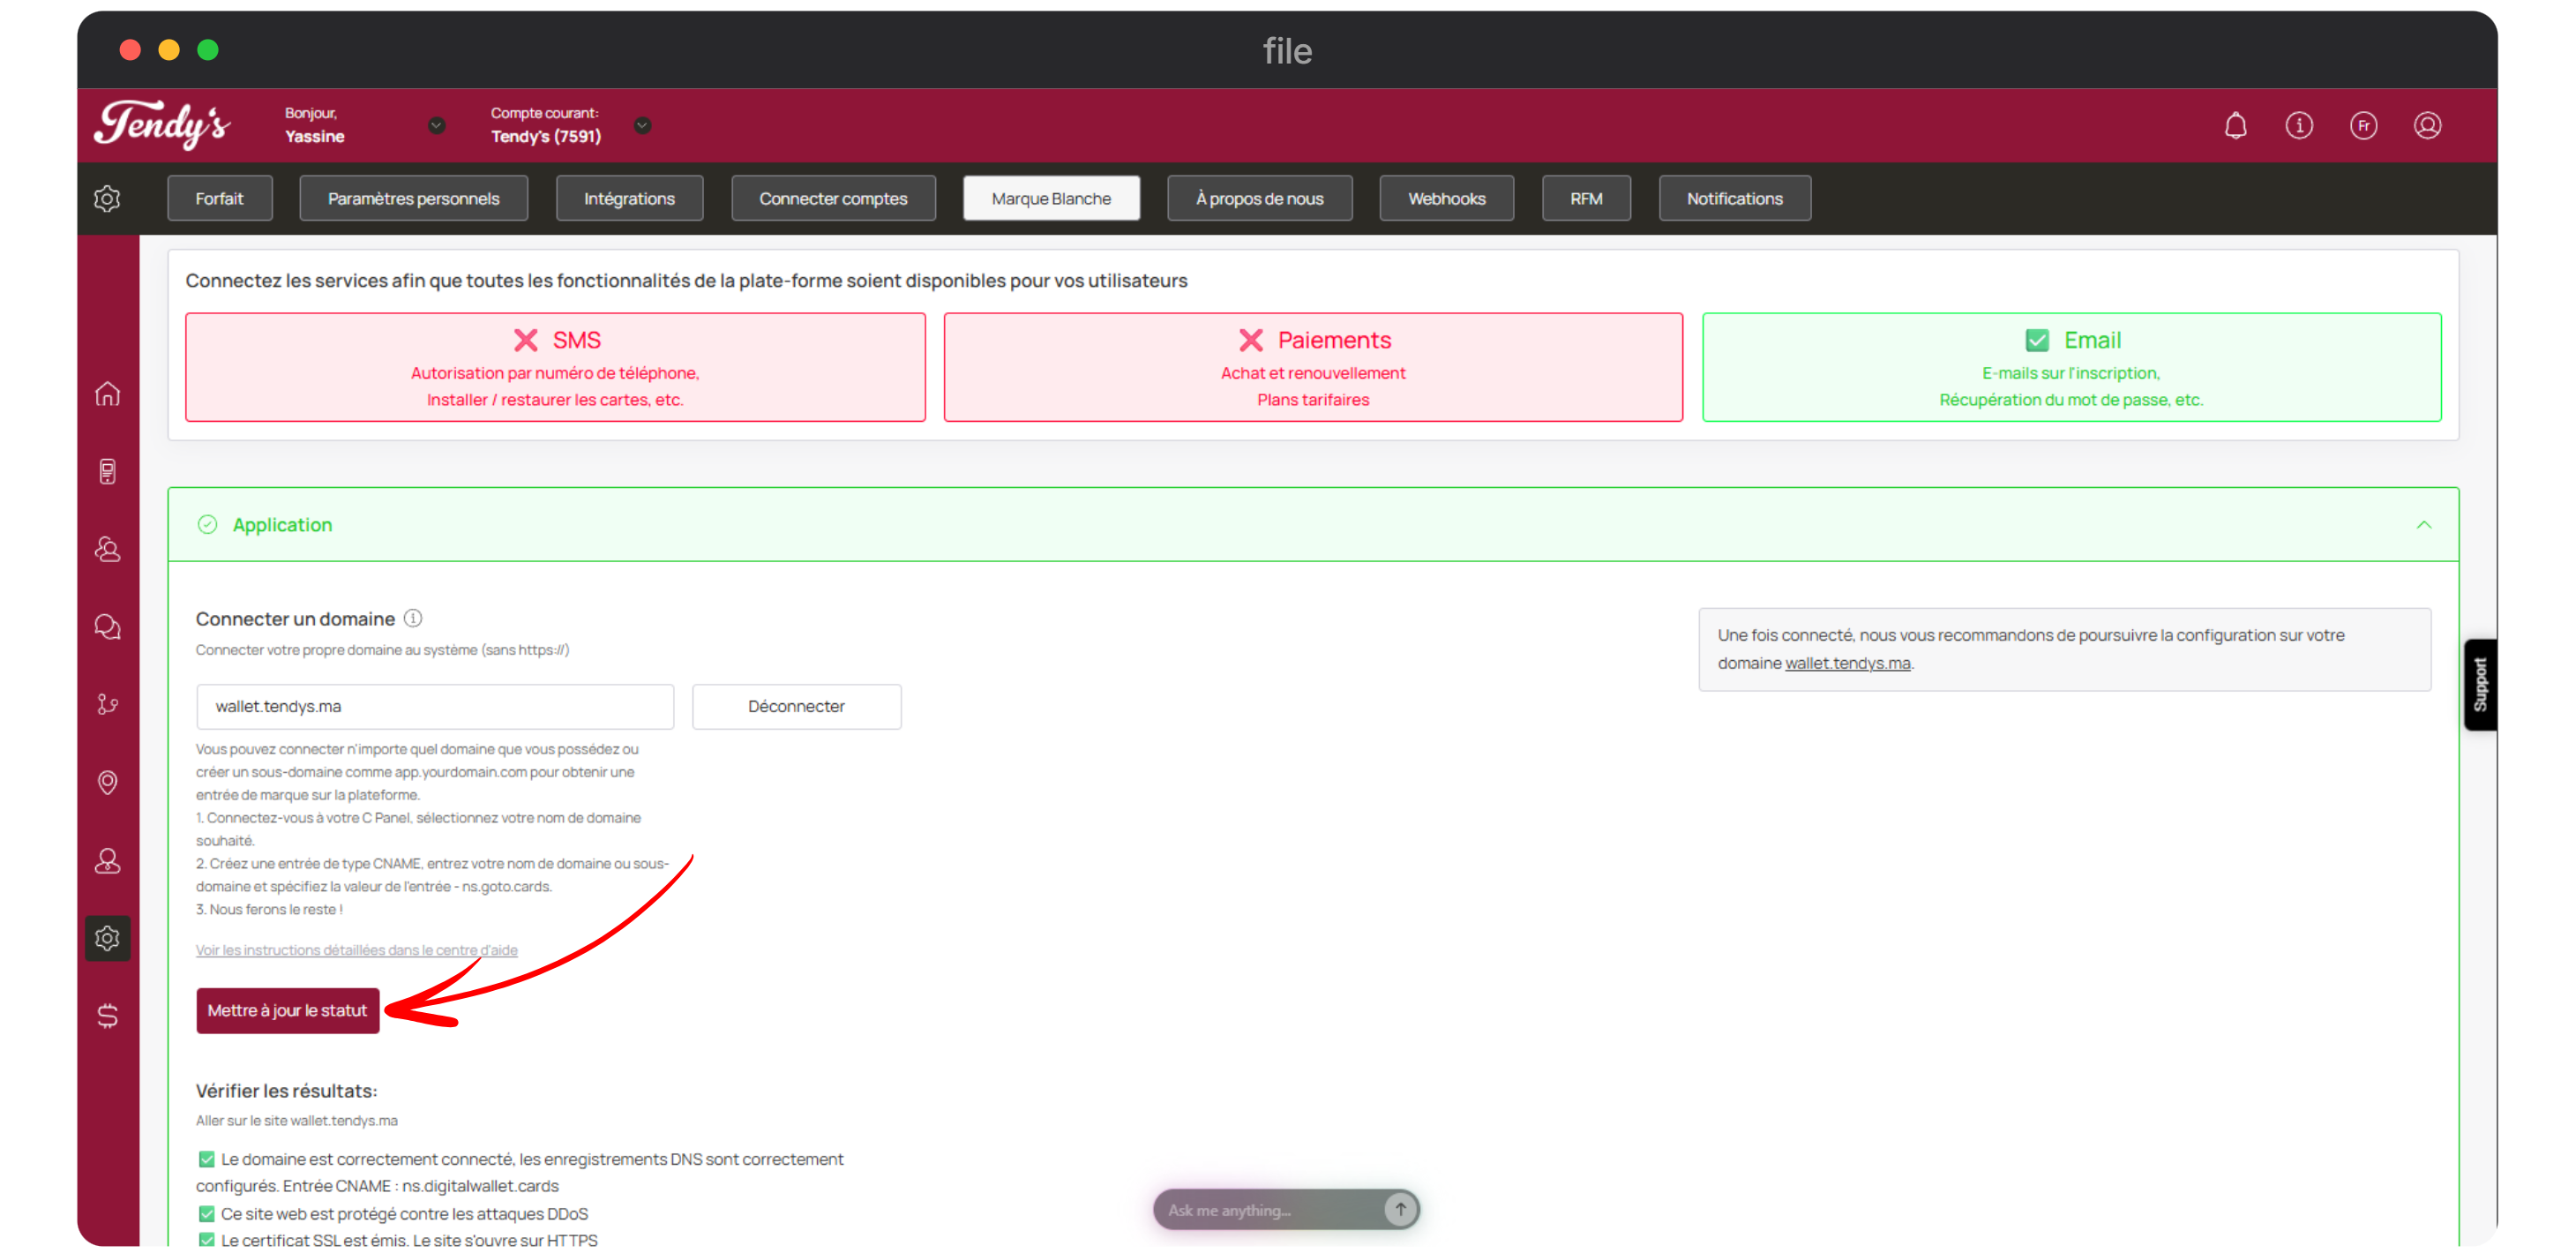
Update Status
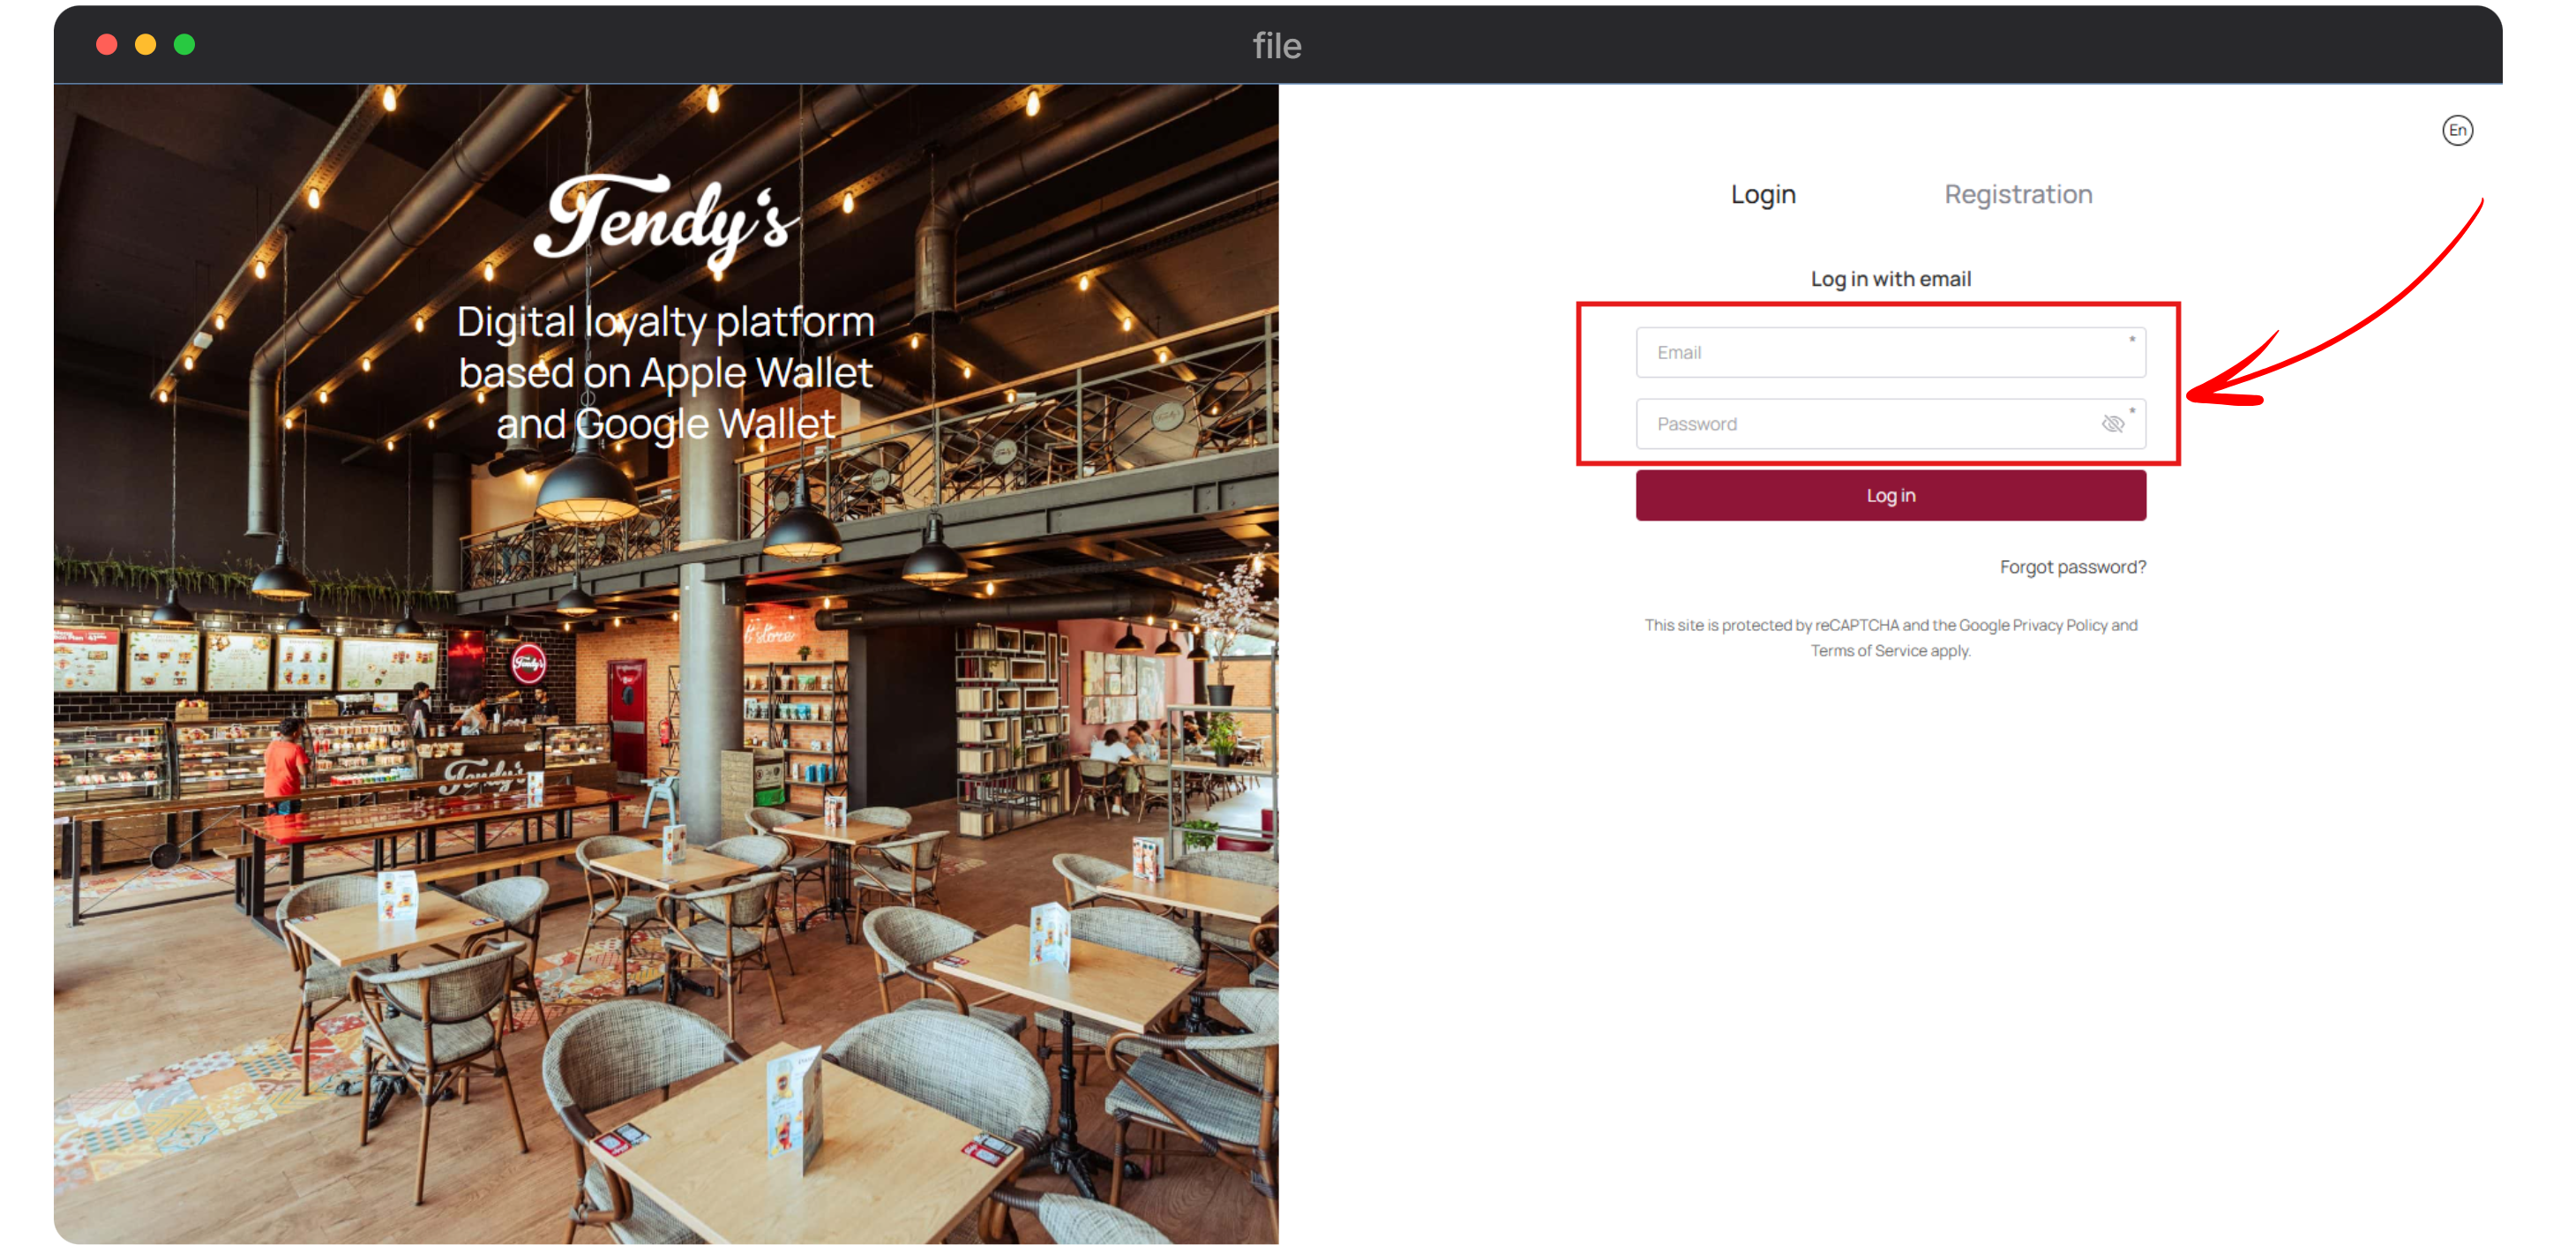
After that, go to your domain URL to change the rest of the settings. ✅ Only after the certificate is issued, the tabs for branding customization will become active. ❗This is an important point. Otherwise, you will get an access error. Access denied.
wallet.tendys.ma
This opens the white labelled login page. Here, use the same login credentials for TRYB Loyalty's domain (app.trybcard.com) to login. If you created your account without a password, you need to do a password recovery on TRYB Loyalty's domain first before you proceed to login to your domain.
Login
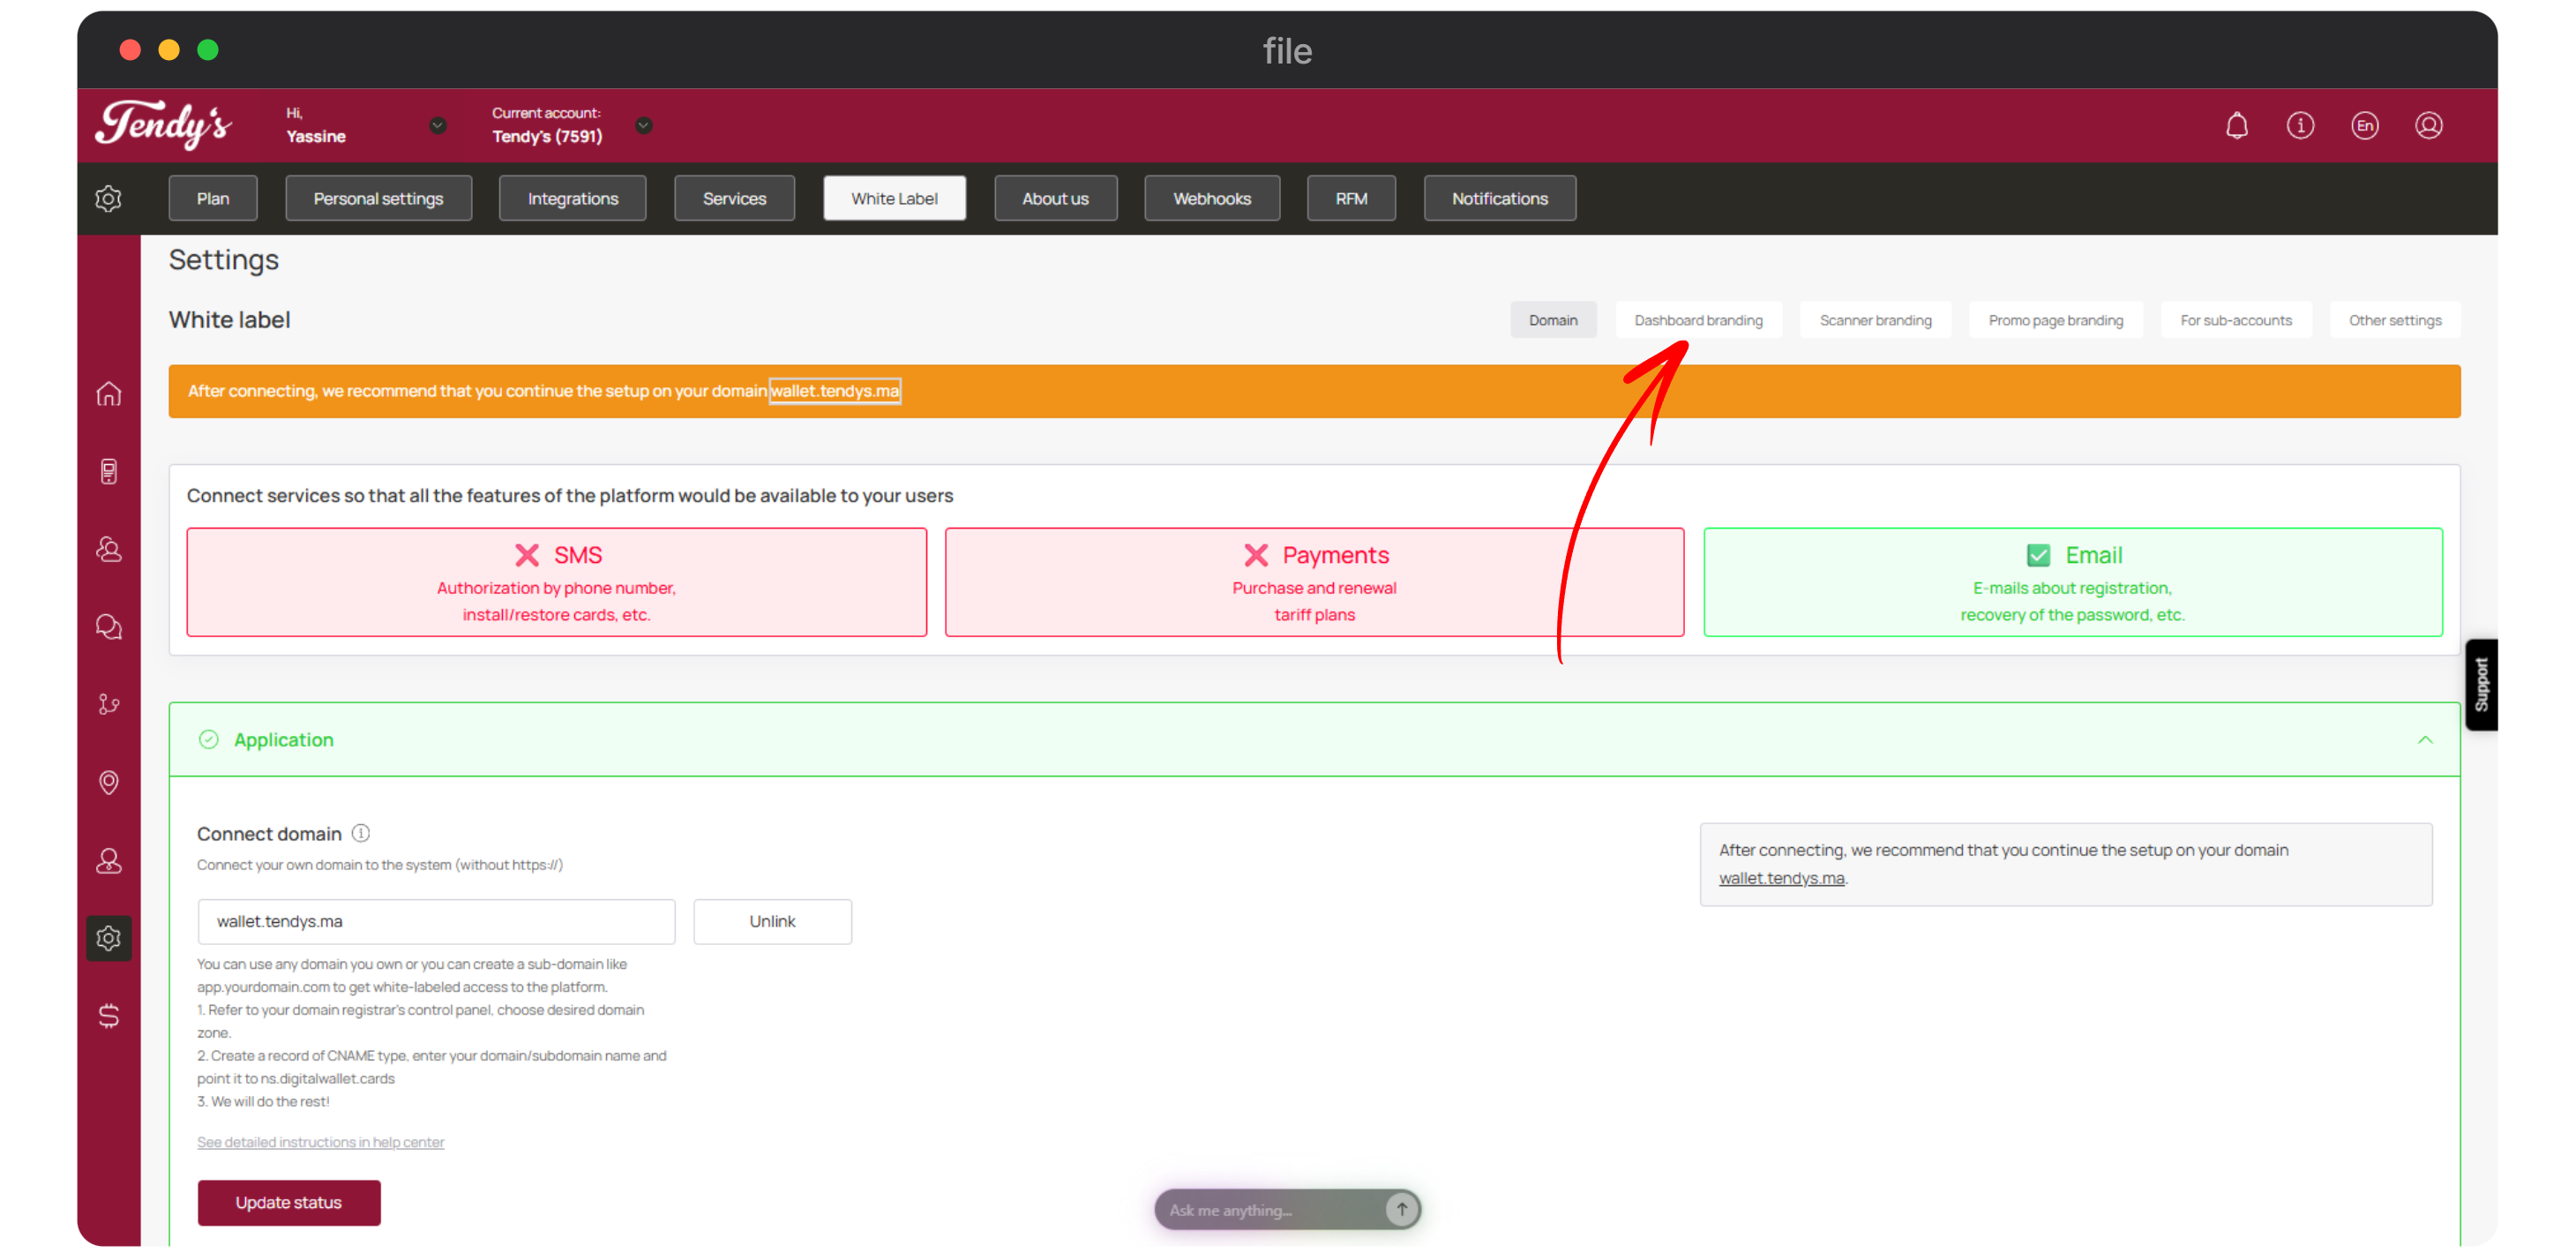
Once you have logged into your domain successfully, go to the Settings module under your agency and click on the whitelabel tab. Go to the Settings module and open White Label tab.
White Label
This completes the domain connection. To start the branding, click the Dashboard branding button.
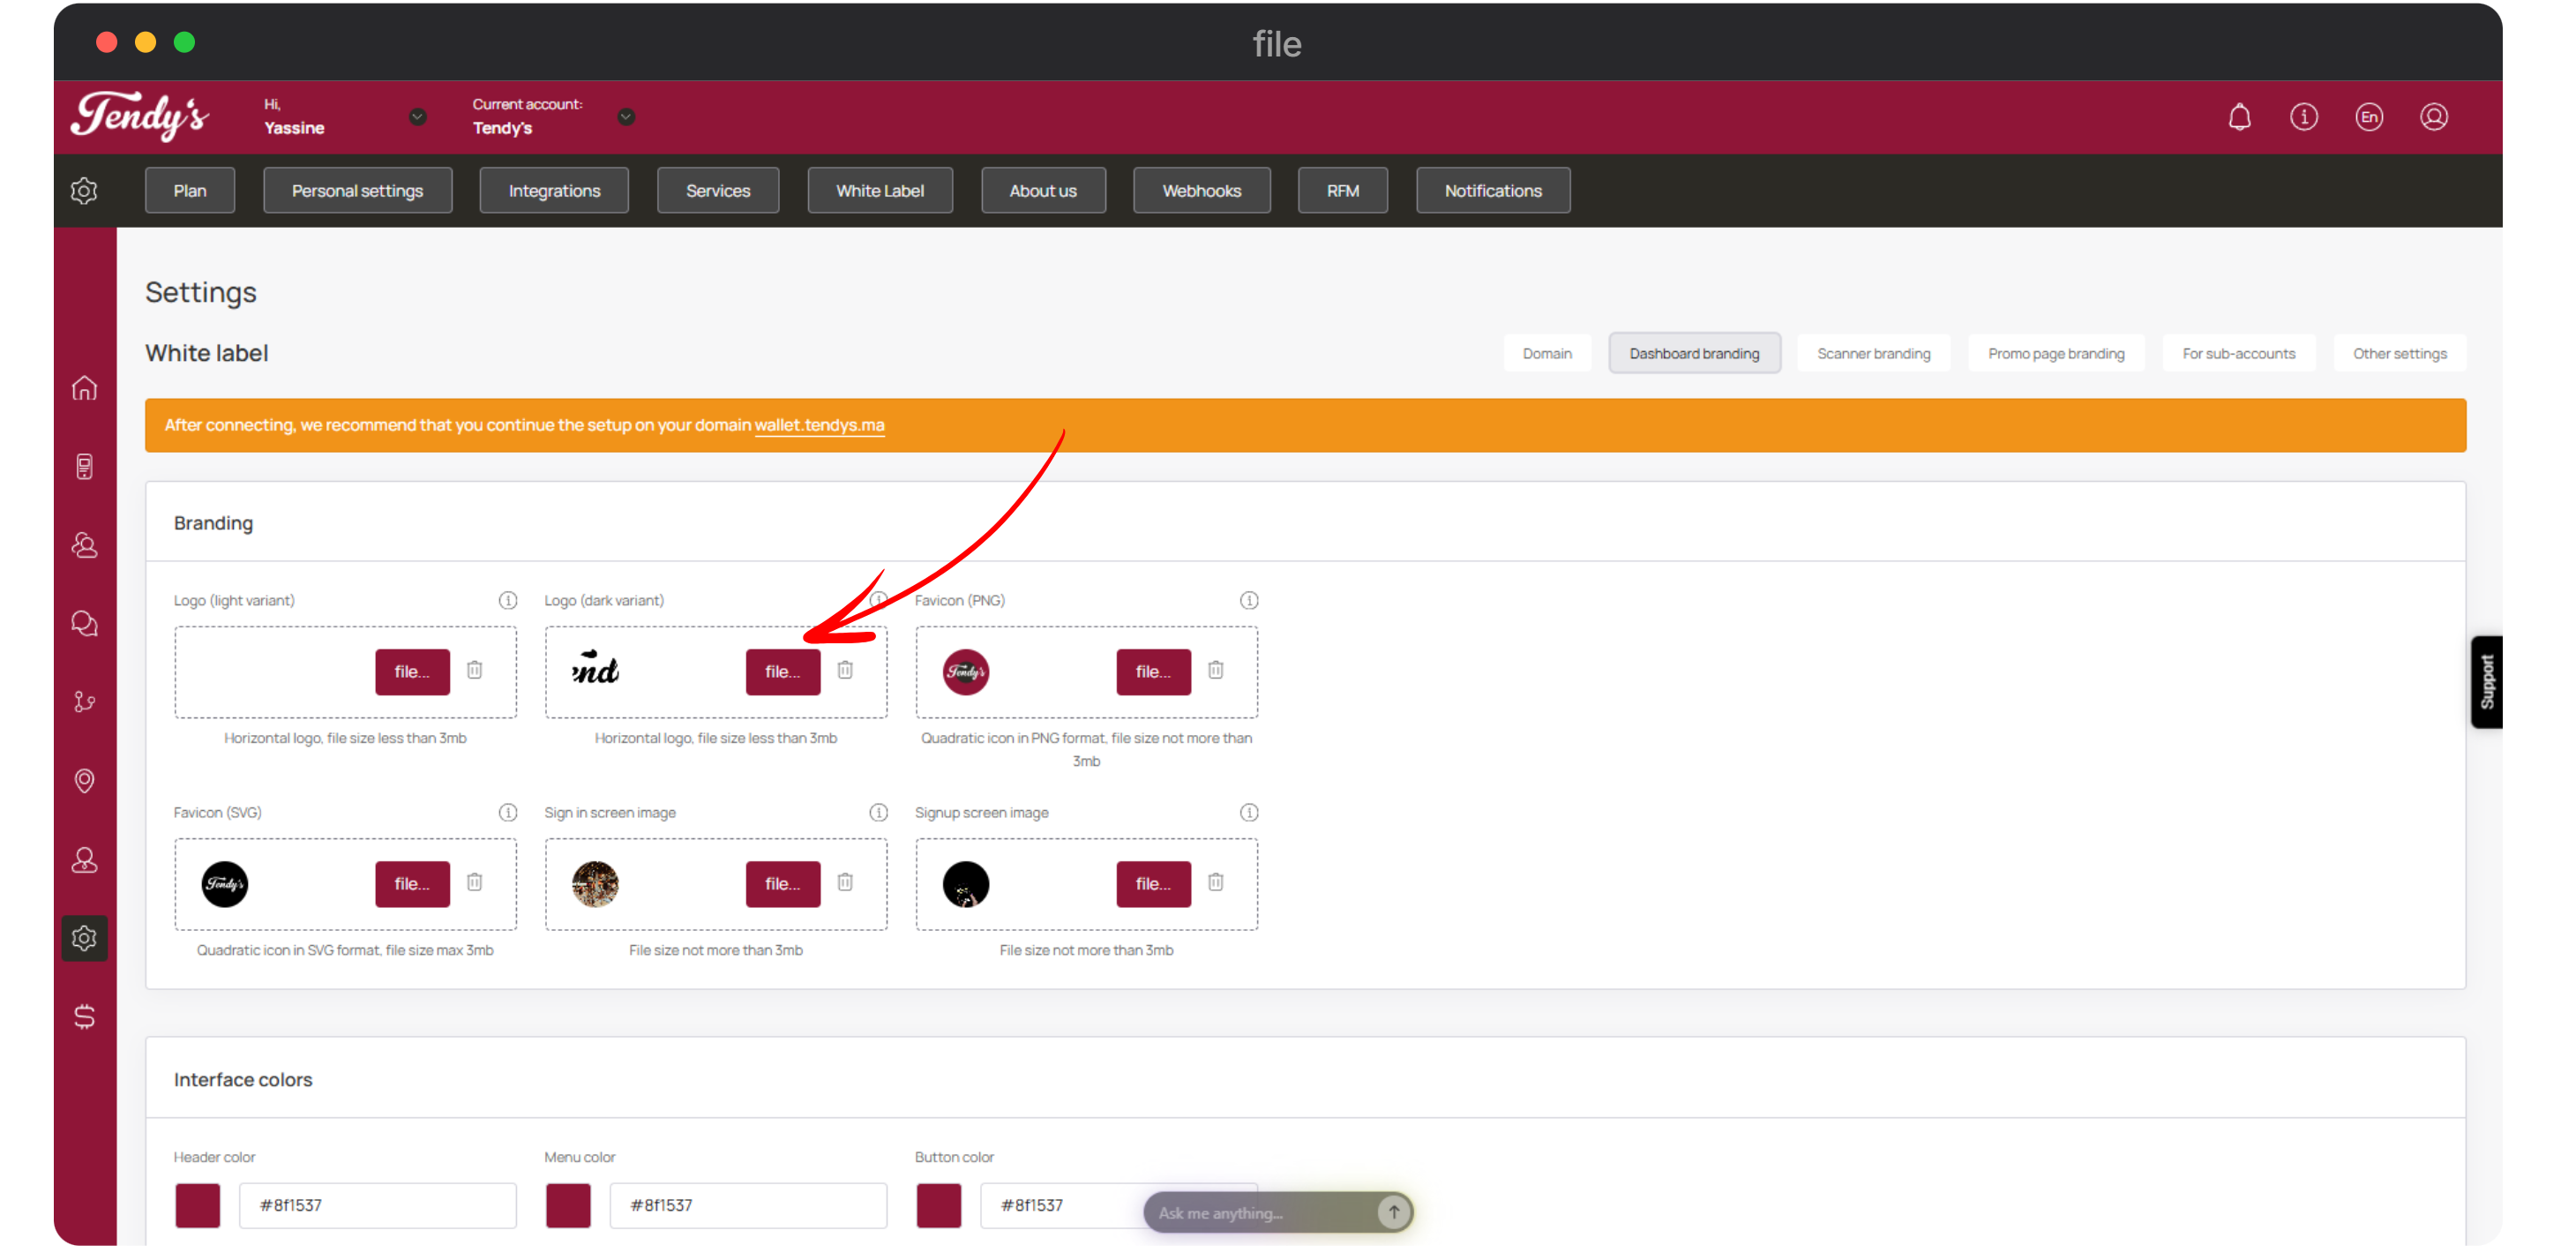
Branding
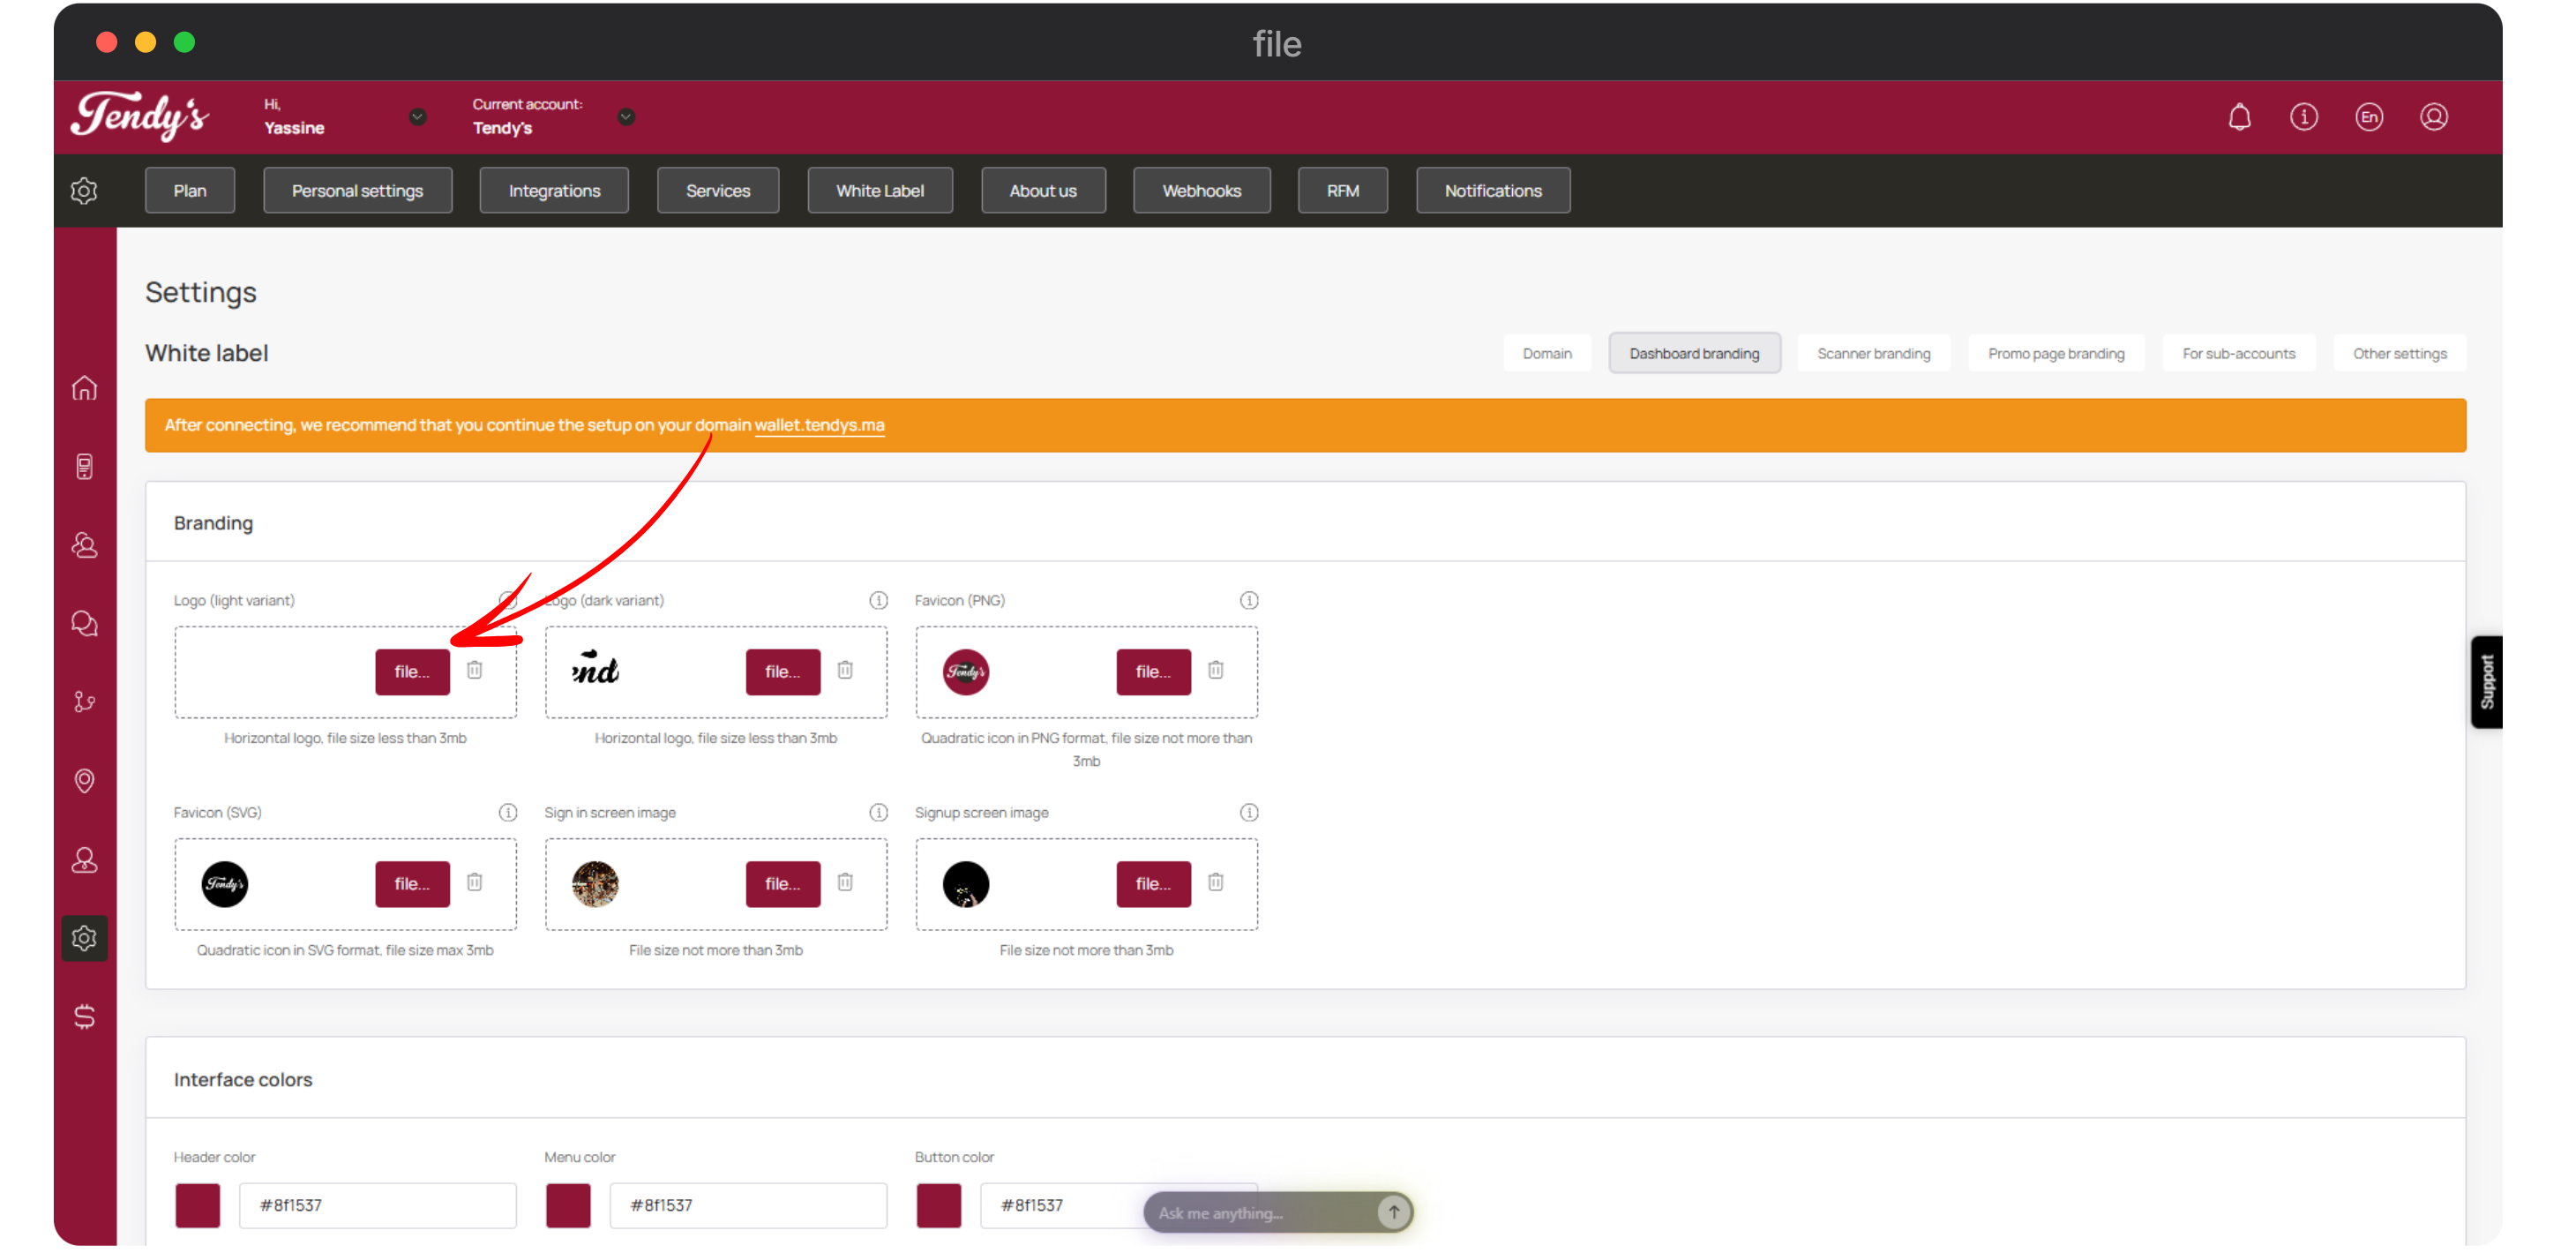
This tab lets you set the theme of your web portal.
Light logo (Logo, light variant)From the dashboard branding section, click the File button for Logo (light variant) and upload your selected file as your logo, this will be displayed on your dashboard as well as on your login page.
✅ The light logo is displayed in the interface header and on the login page. In addition, this logo is also shown on the Agency promo page. The recommended aspect ratio is 16:3, with a minimum size of 210×44 px.
Remember to pay attention to the accurate proportions, you can get the accurate proportions for each tab by hovering over the i icon.
❗While completing the settings, remember that the image uploaded should be less than 3mb and it should also be in PNG format. The only exception is the second favicon that should be in SVG format.
Logo (Light Variant)
Dark logo (Logo, dark variant) Similarly, choose the logo for the dark variant by clicking the File button from the Logo (dark variant) tab.
✅ The dark logo is displayed in the interface header and on the login page in the mobile version. In addition, this logo is used on the Proposal Page for subaccounts, where it appears as part of the agency’s branded proposal. The recommended aspect ratio is 16:3, with a minimum size of 210×44 px.
Logo (dark variant)
Use the Favicon (PNG) and Favicon (SVG) tiles to upload the favicon file in PNG and SVG formats respectively. Favicon in PNG format is displayed in the browser tab. The recommended aspect ratio is 1:1, with a minimum size of 16×16 px. Favicon in SVG format is shown on the Whitelabel promo page, in the Integrations list block.
The recommended aspect ratio is 1:1, with a minimum size of 256×256 px.
❗ Be sure to upload both versions of the favicon.
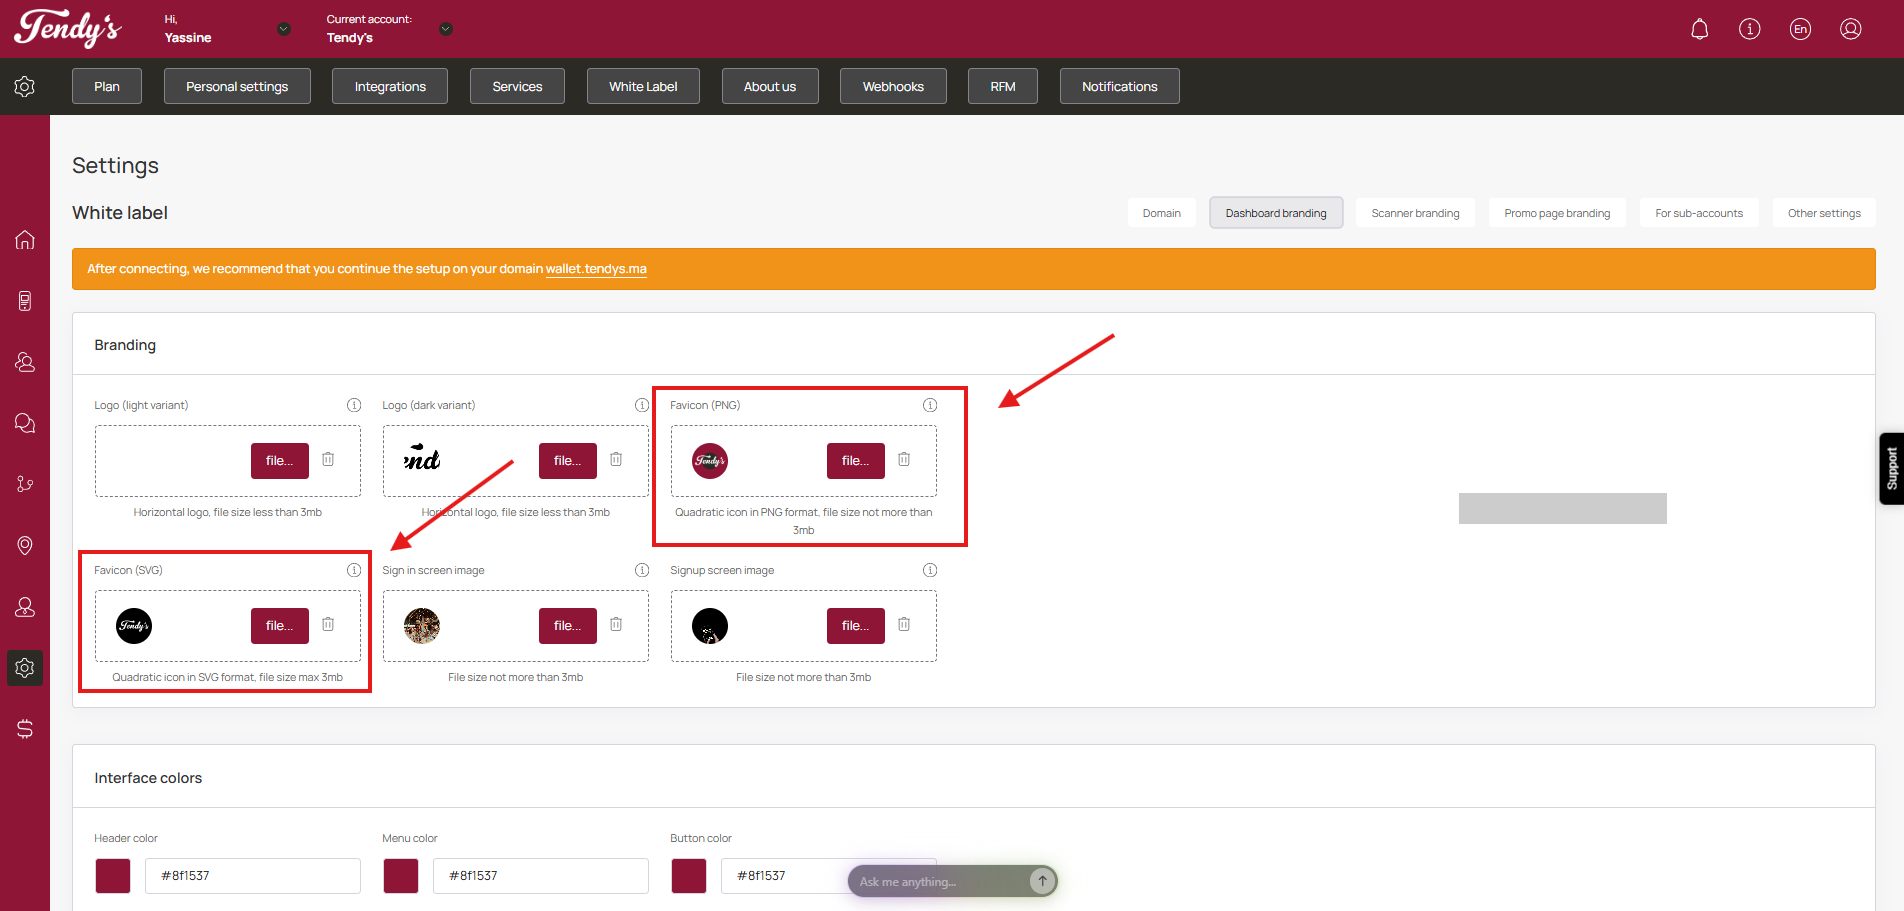
Favicon
Similarly, use the Sign in screen image and Signup screen image tab to upload the screen images for login and registration screens respectively. Image size: 1920x1080
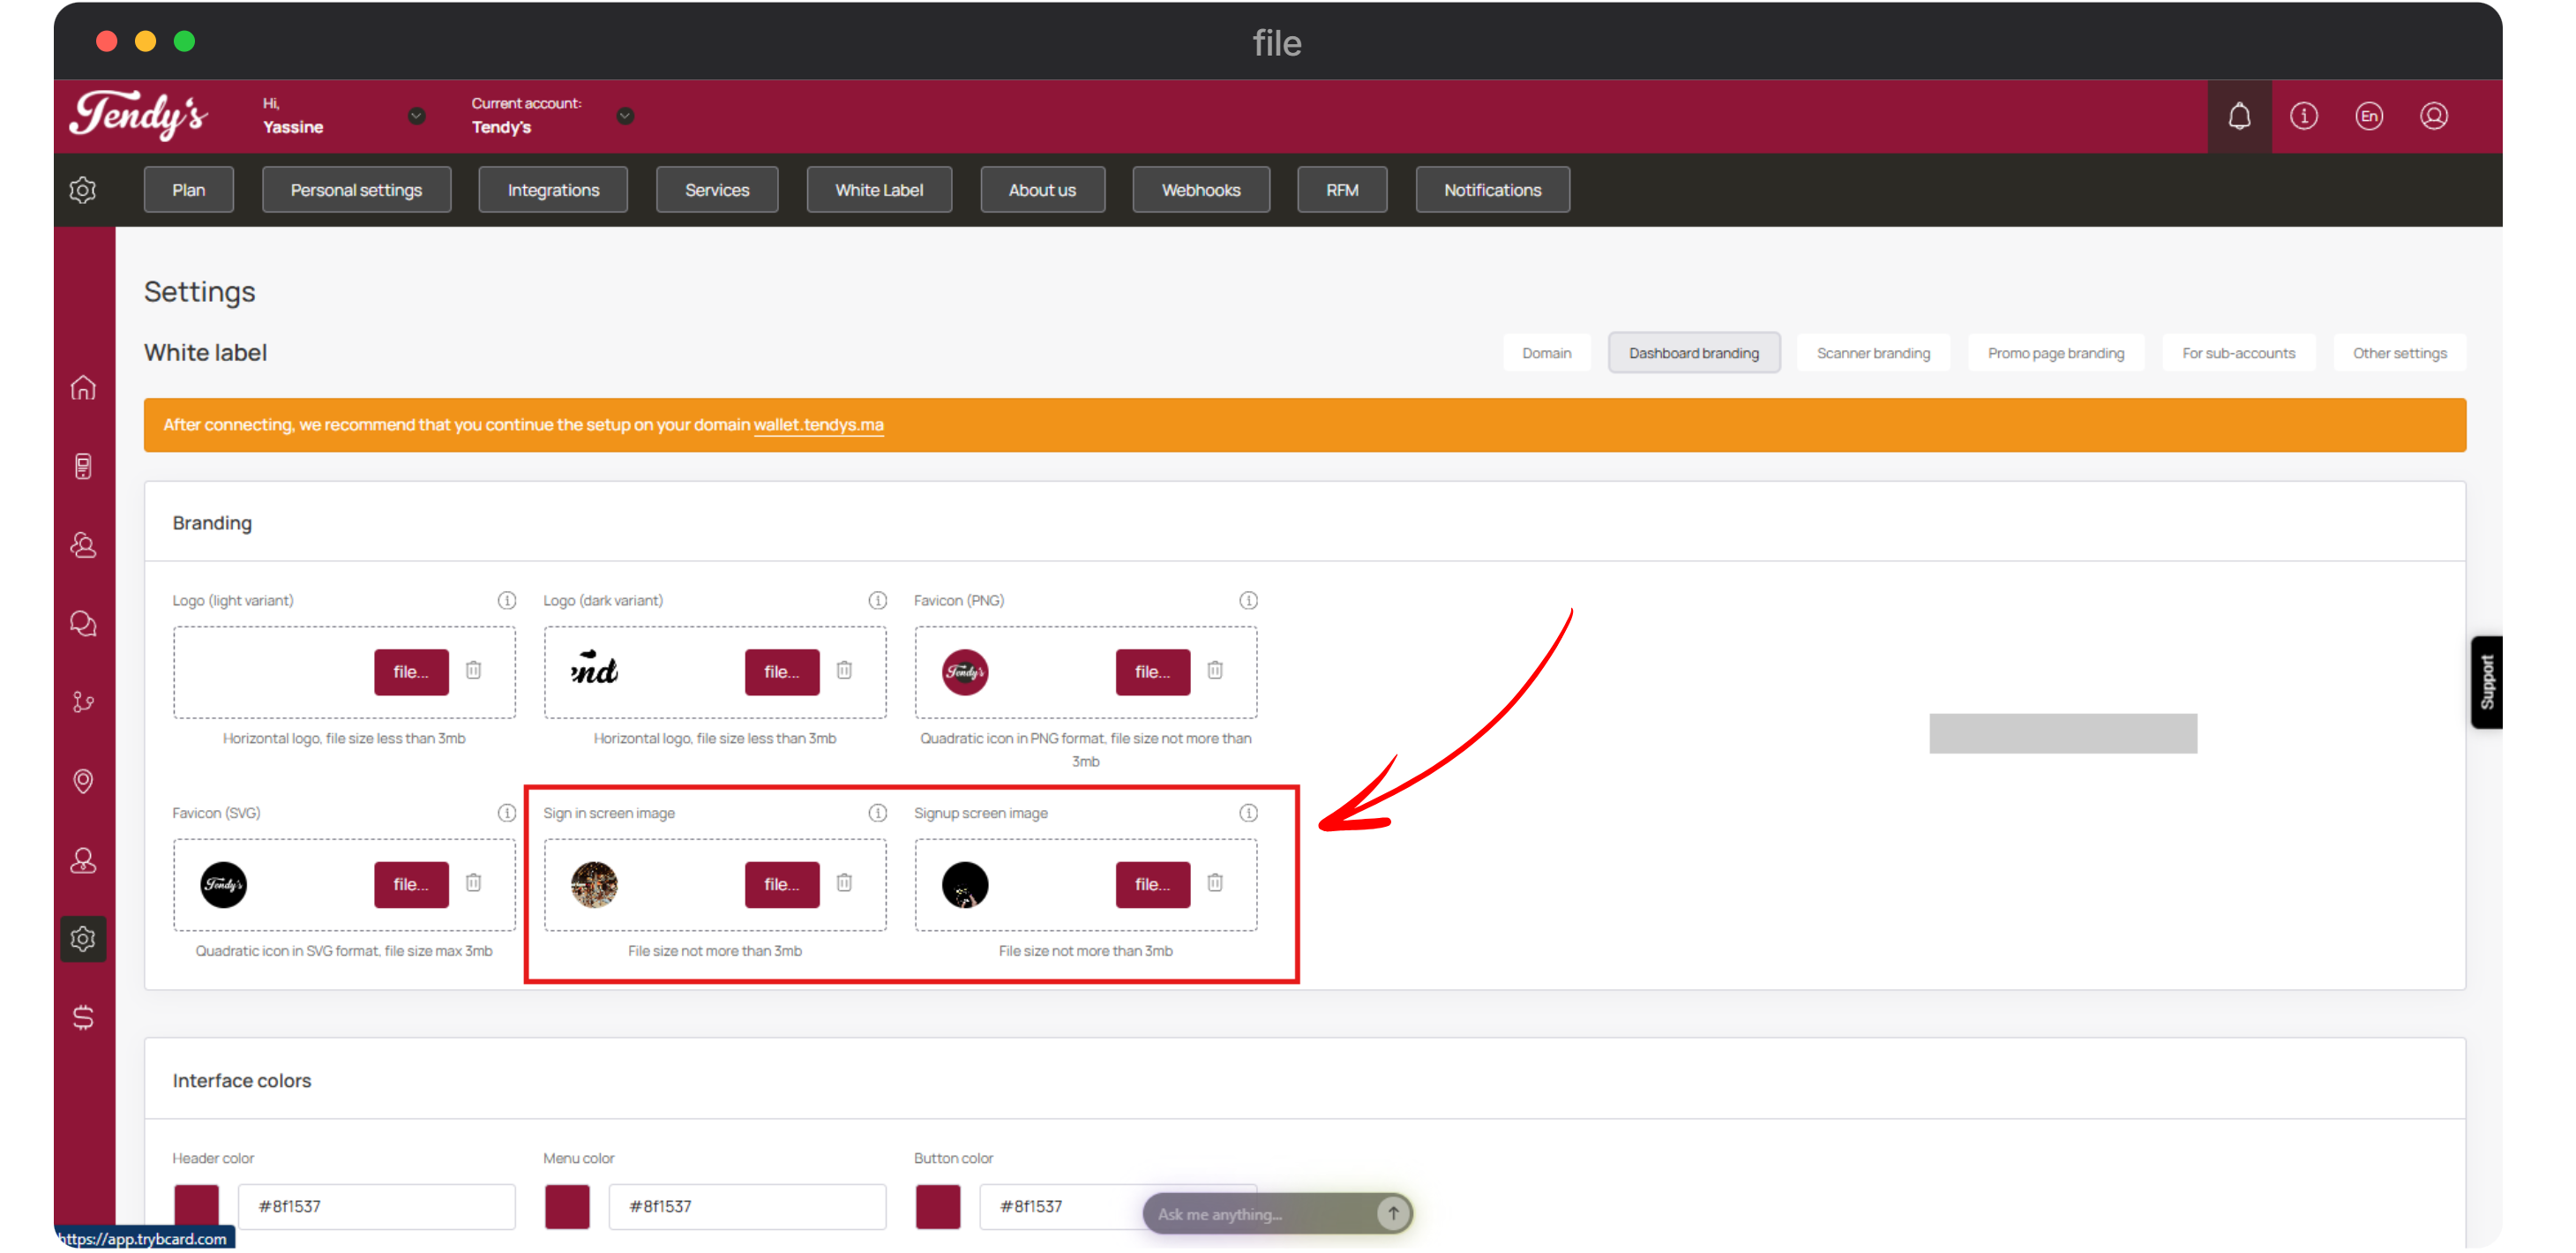
Sign in screen image and Signup screen image
Note, if you're rebranding:
do it one at a time.
be sure to hit “save”.
because of browser cache you may not see the changes immediately. To check, use incognito mode or another browser where you have not opened your domain before.
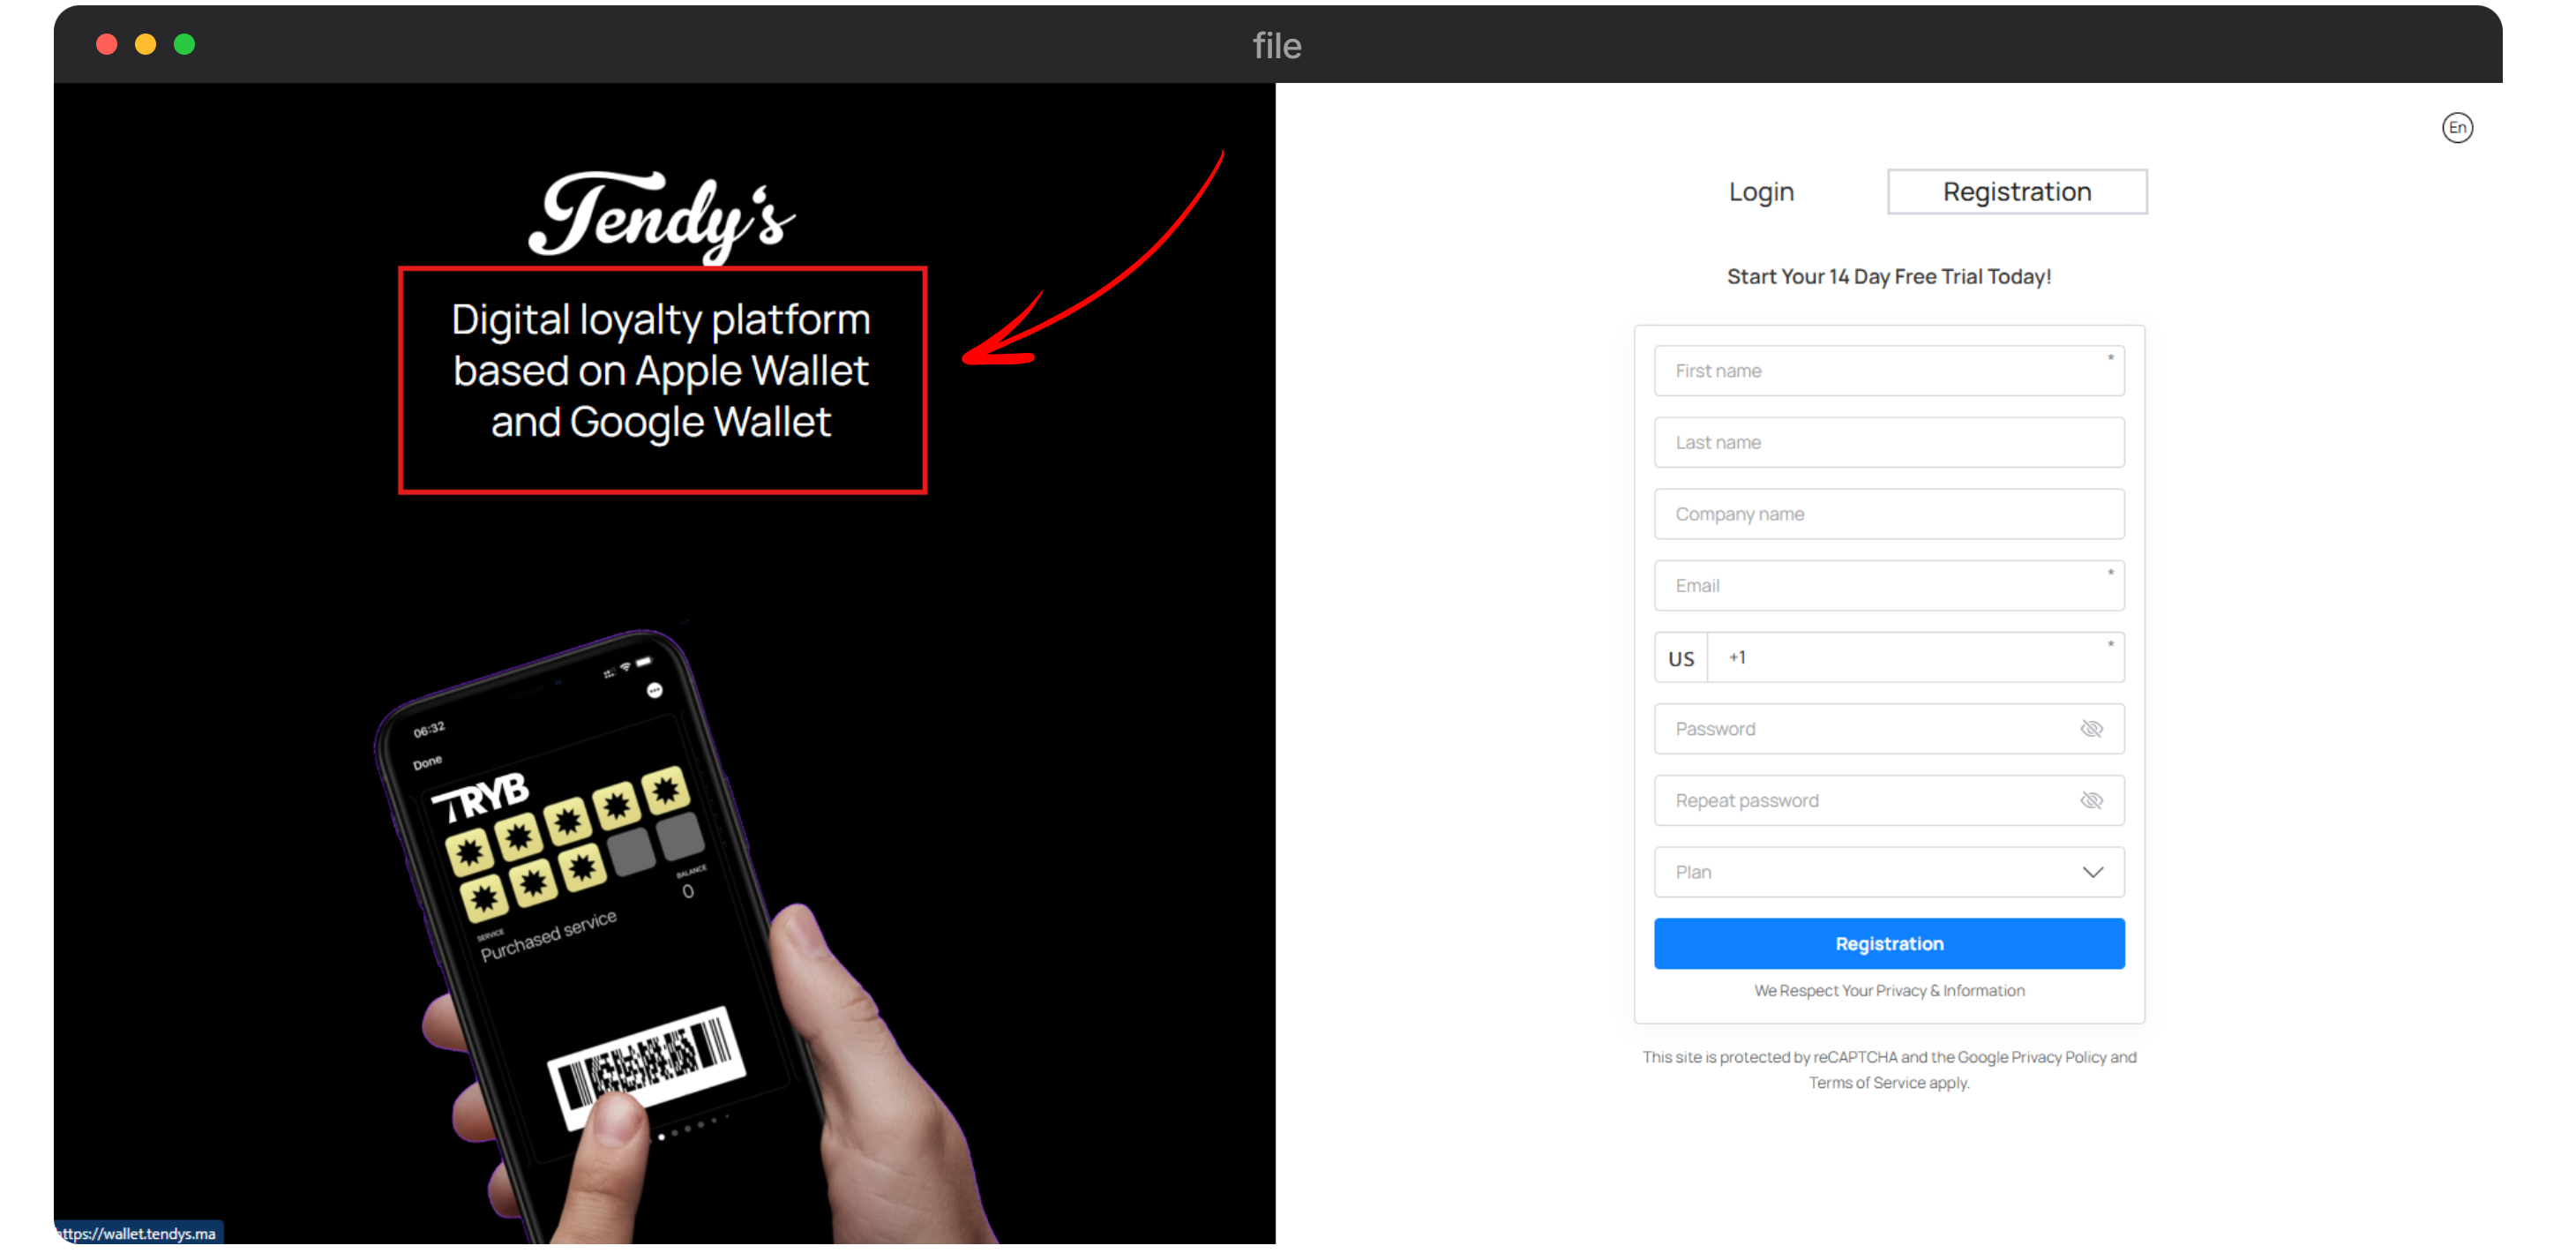
The sign in screen image is displayed on the Sign In screen.
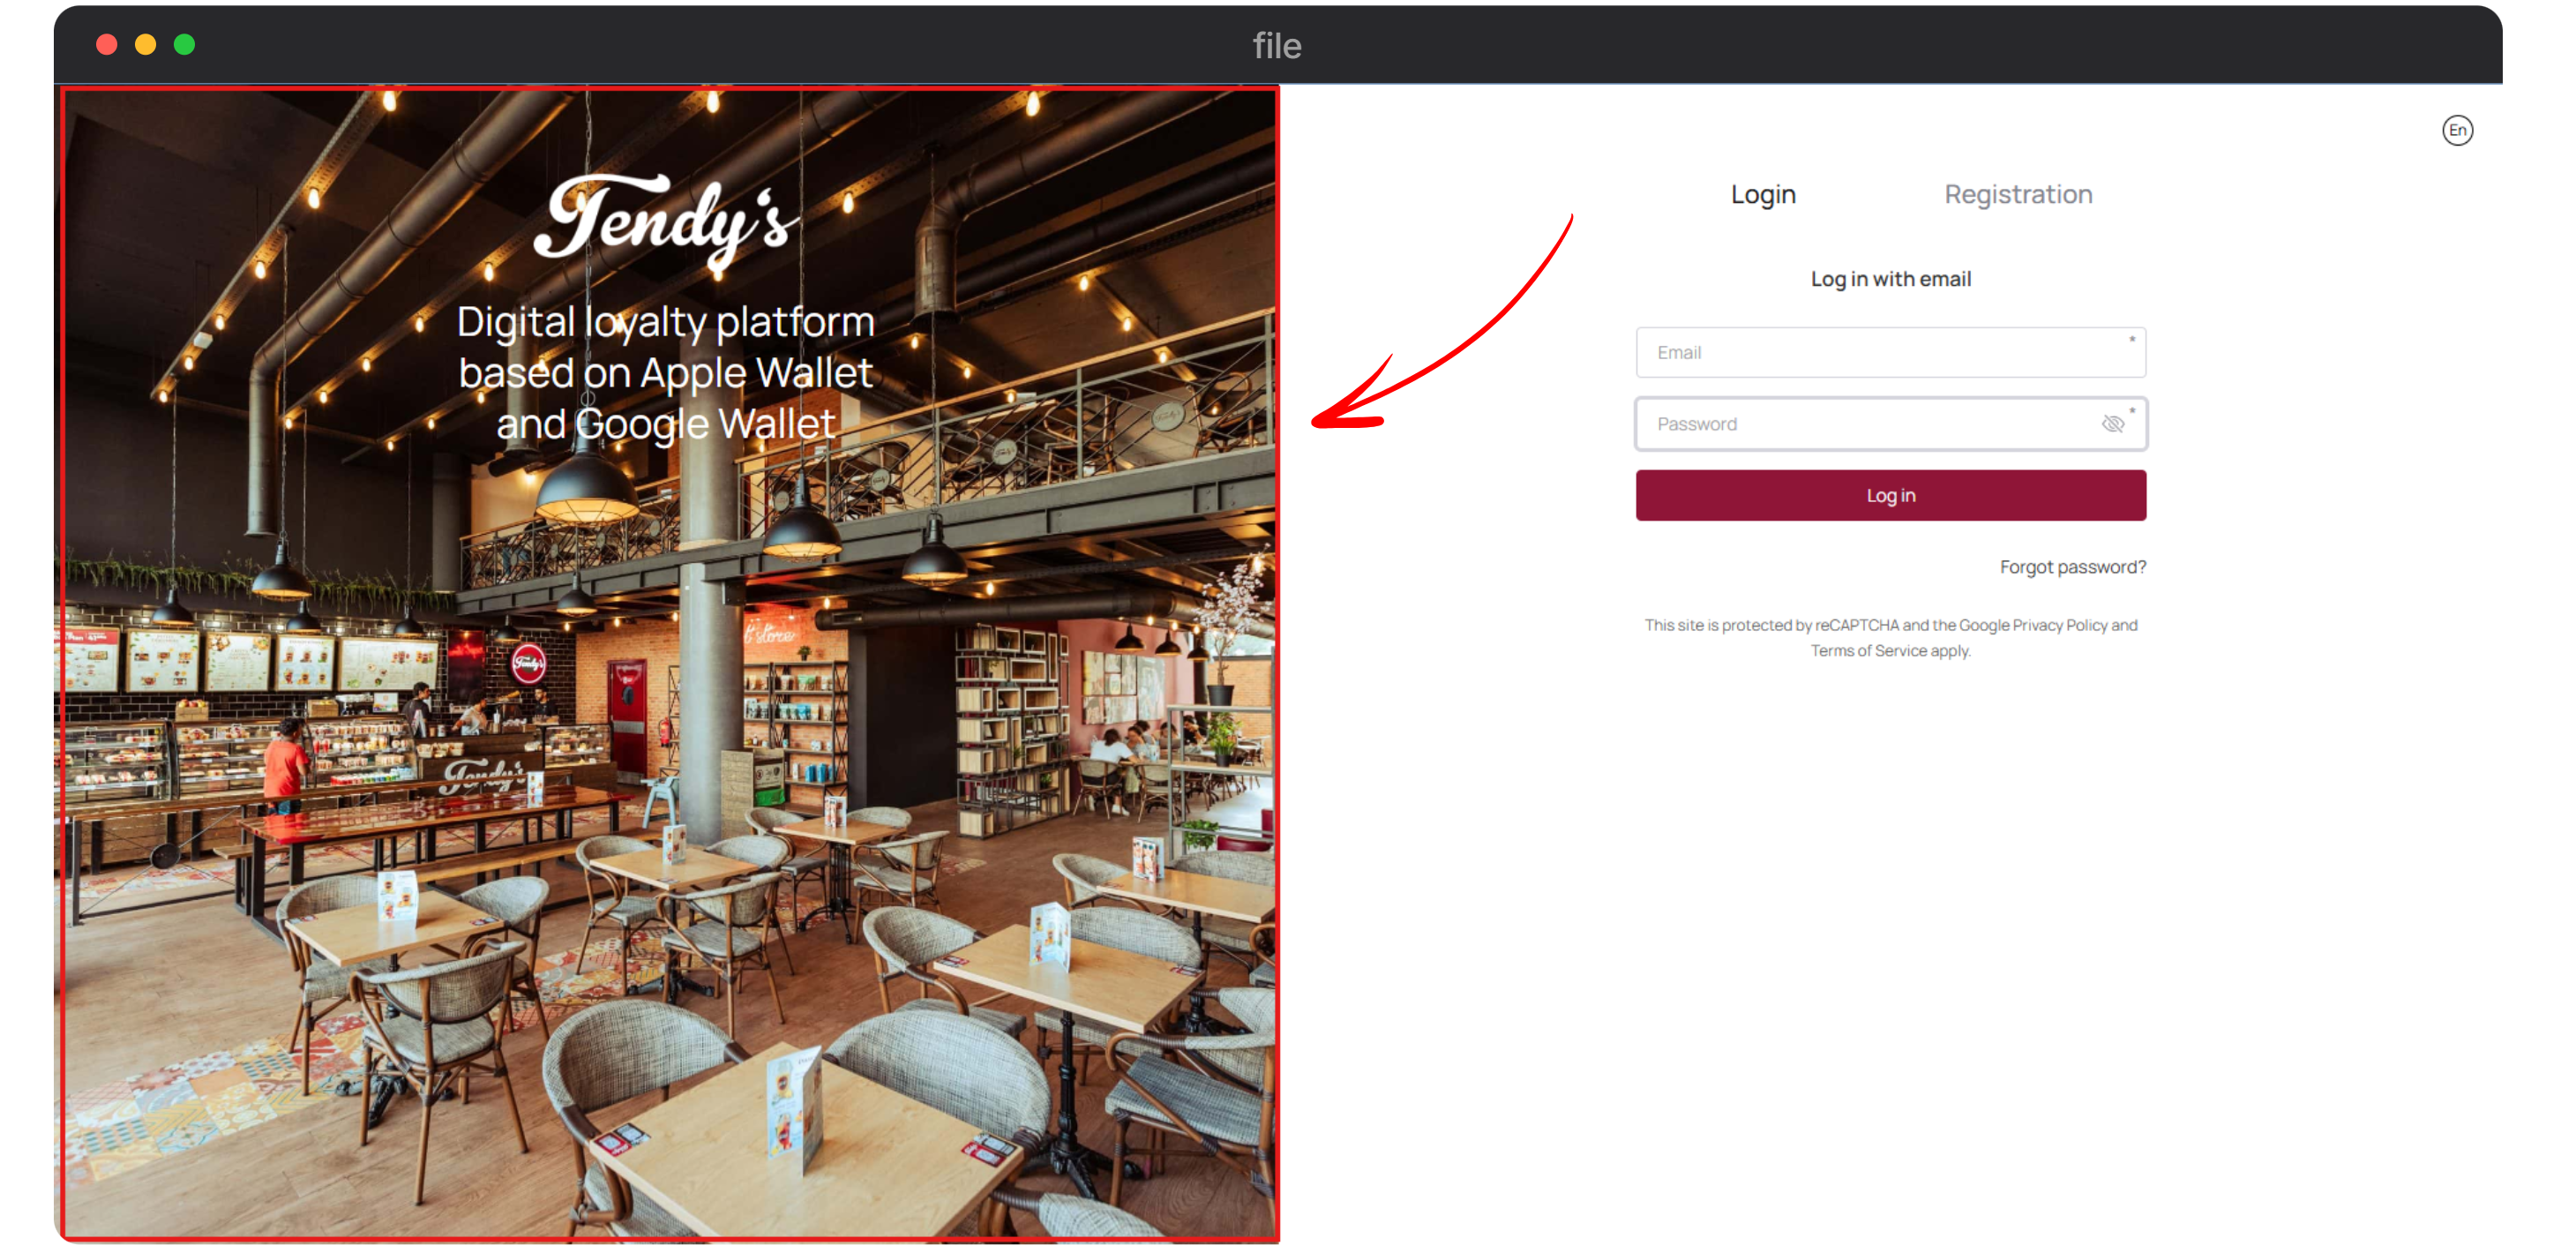
Sign In
Similarly, the Sign Up screen image is displayed on the Registration screen.

Registration
This text cannot be changed.
Next up is the Interface Colors section. Here, a number of color pickers facilitate the selection of Header color, Menu Color, Button Color, Header Text Color, Menu icons color, Button text color, Color in the heading on hovering, submenu color, color of submenu icons, Color of dropdown lists in the header, Active menu items color, and Menu items color on hovering. Once the selections are made, click the Save button. Once the selections are made, click the Save button.
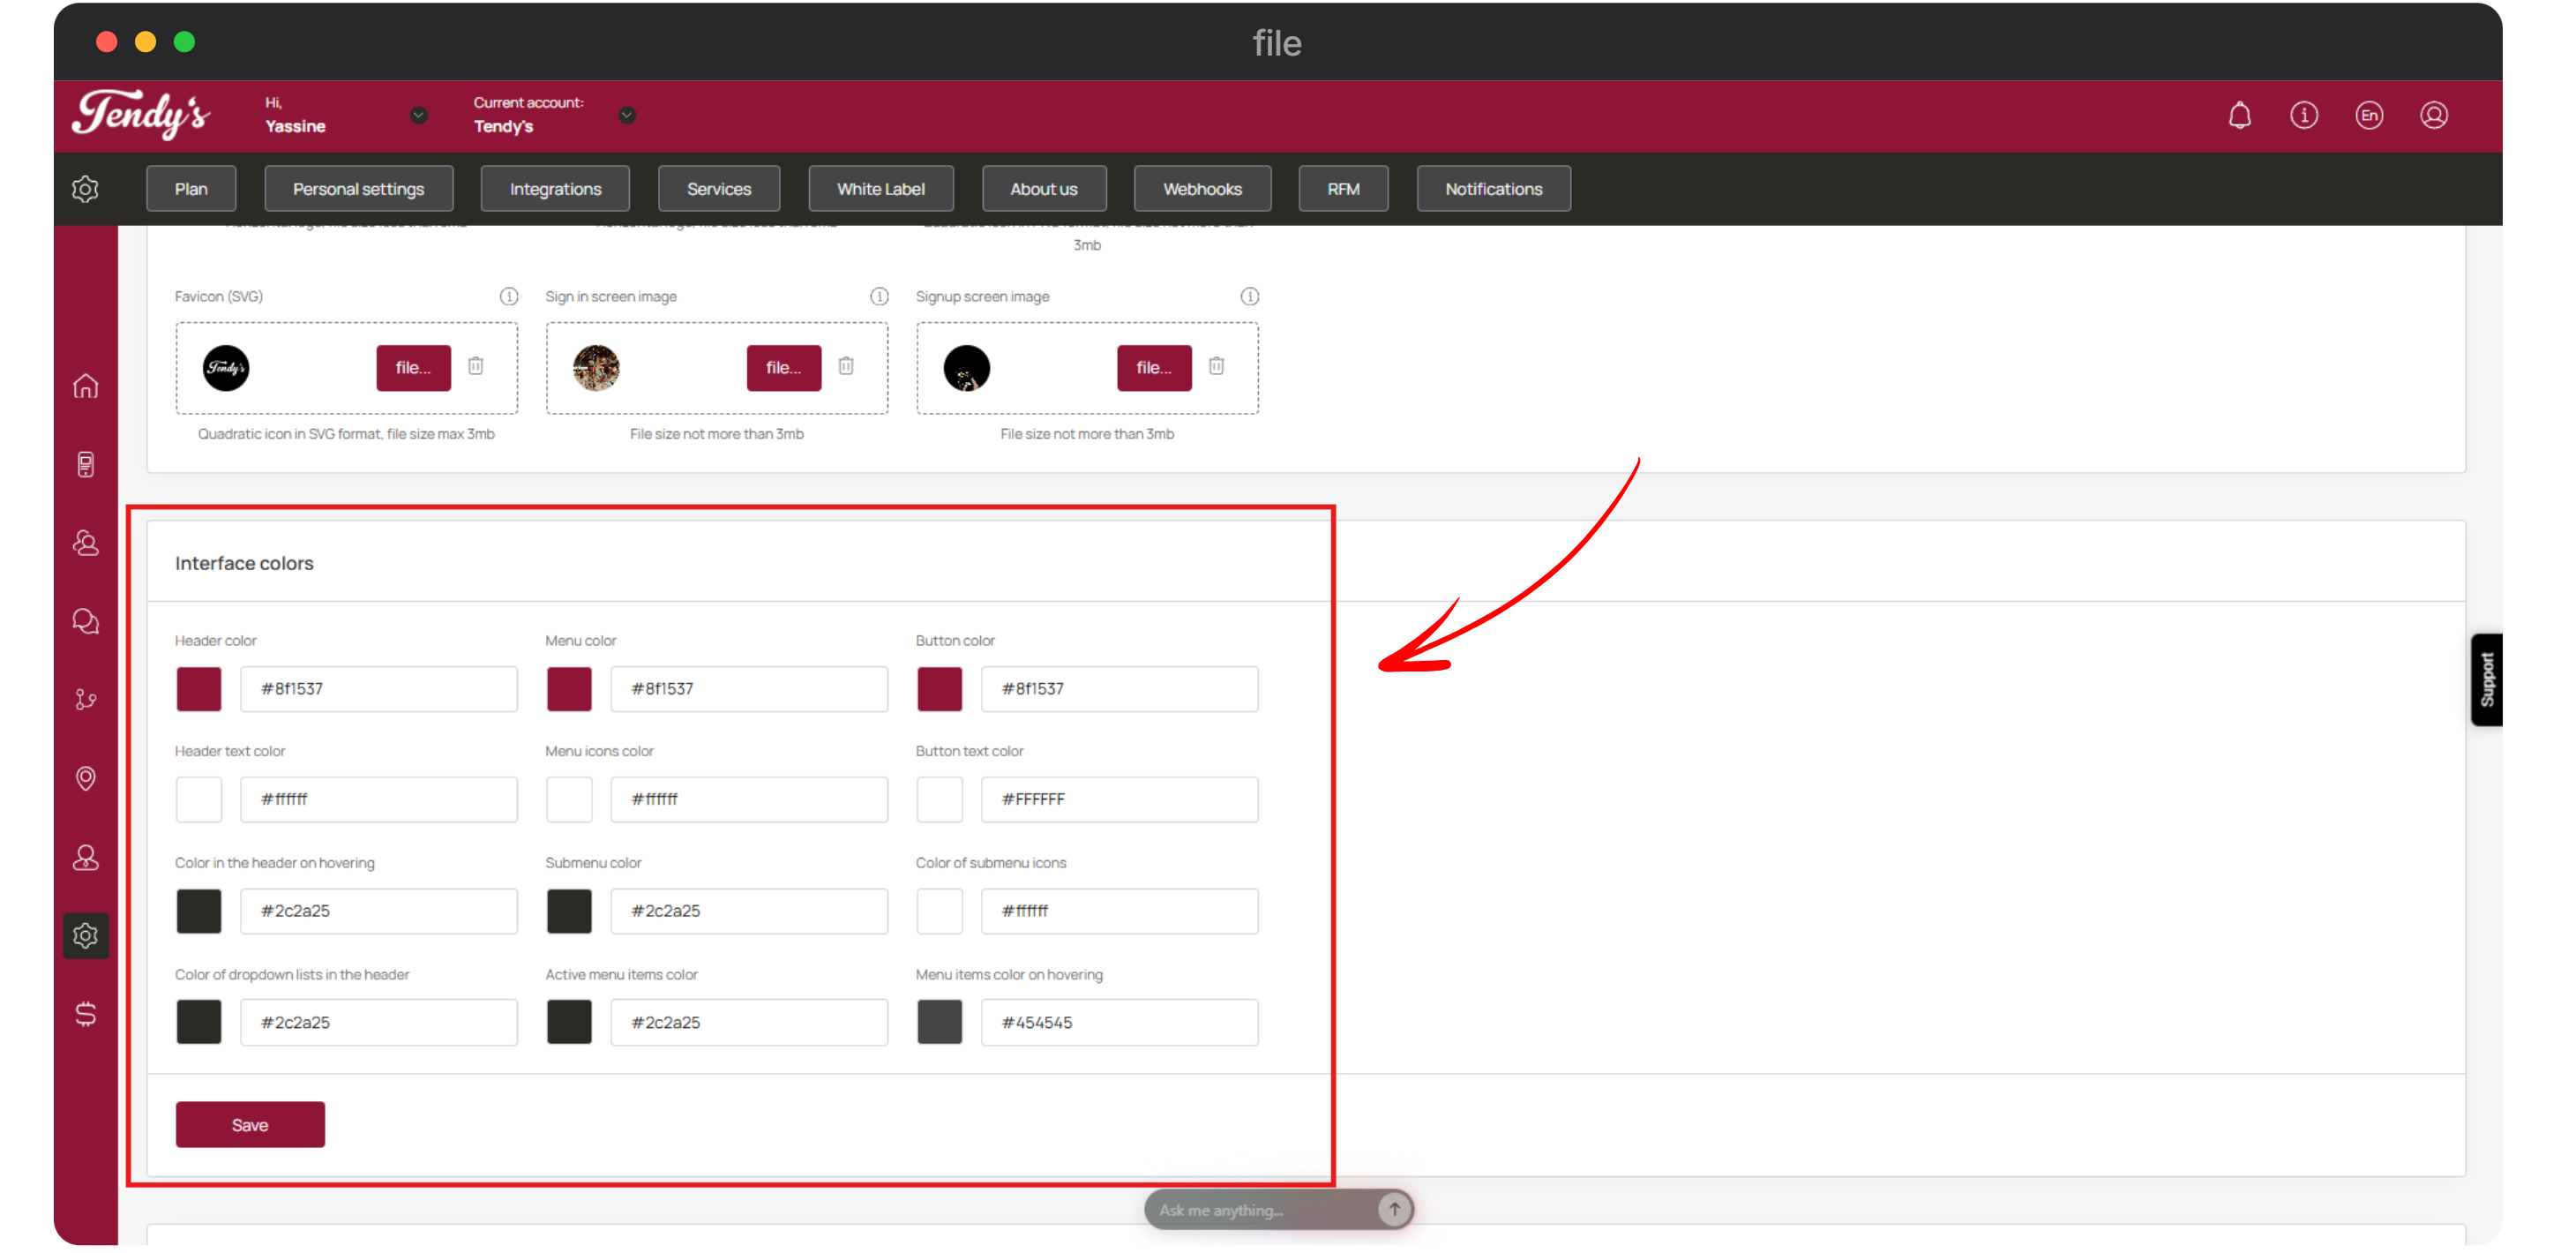
Interface Colors
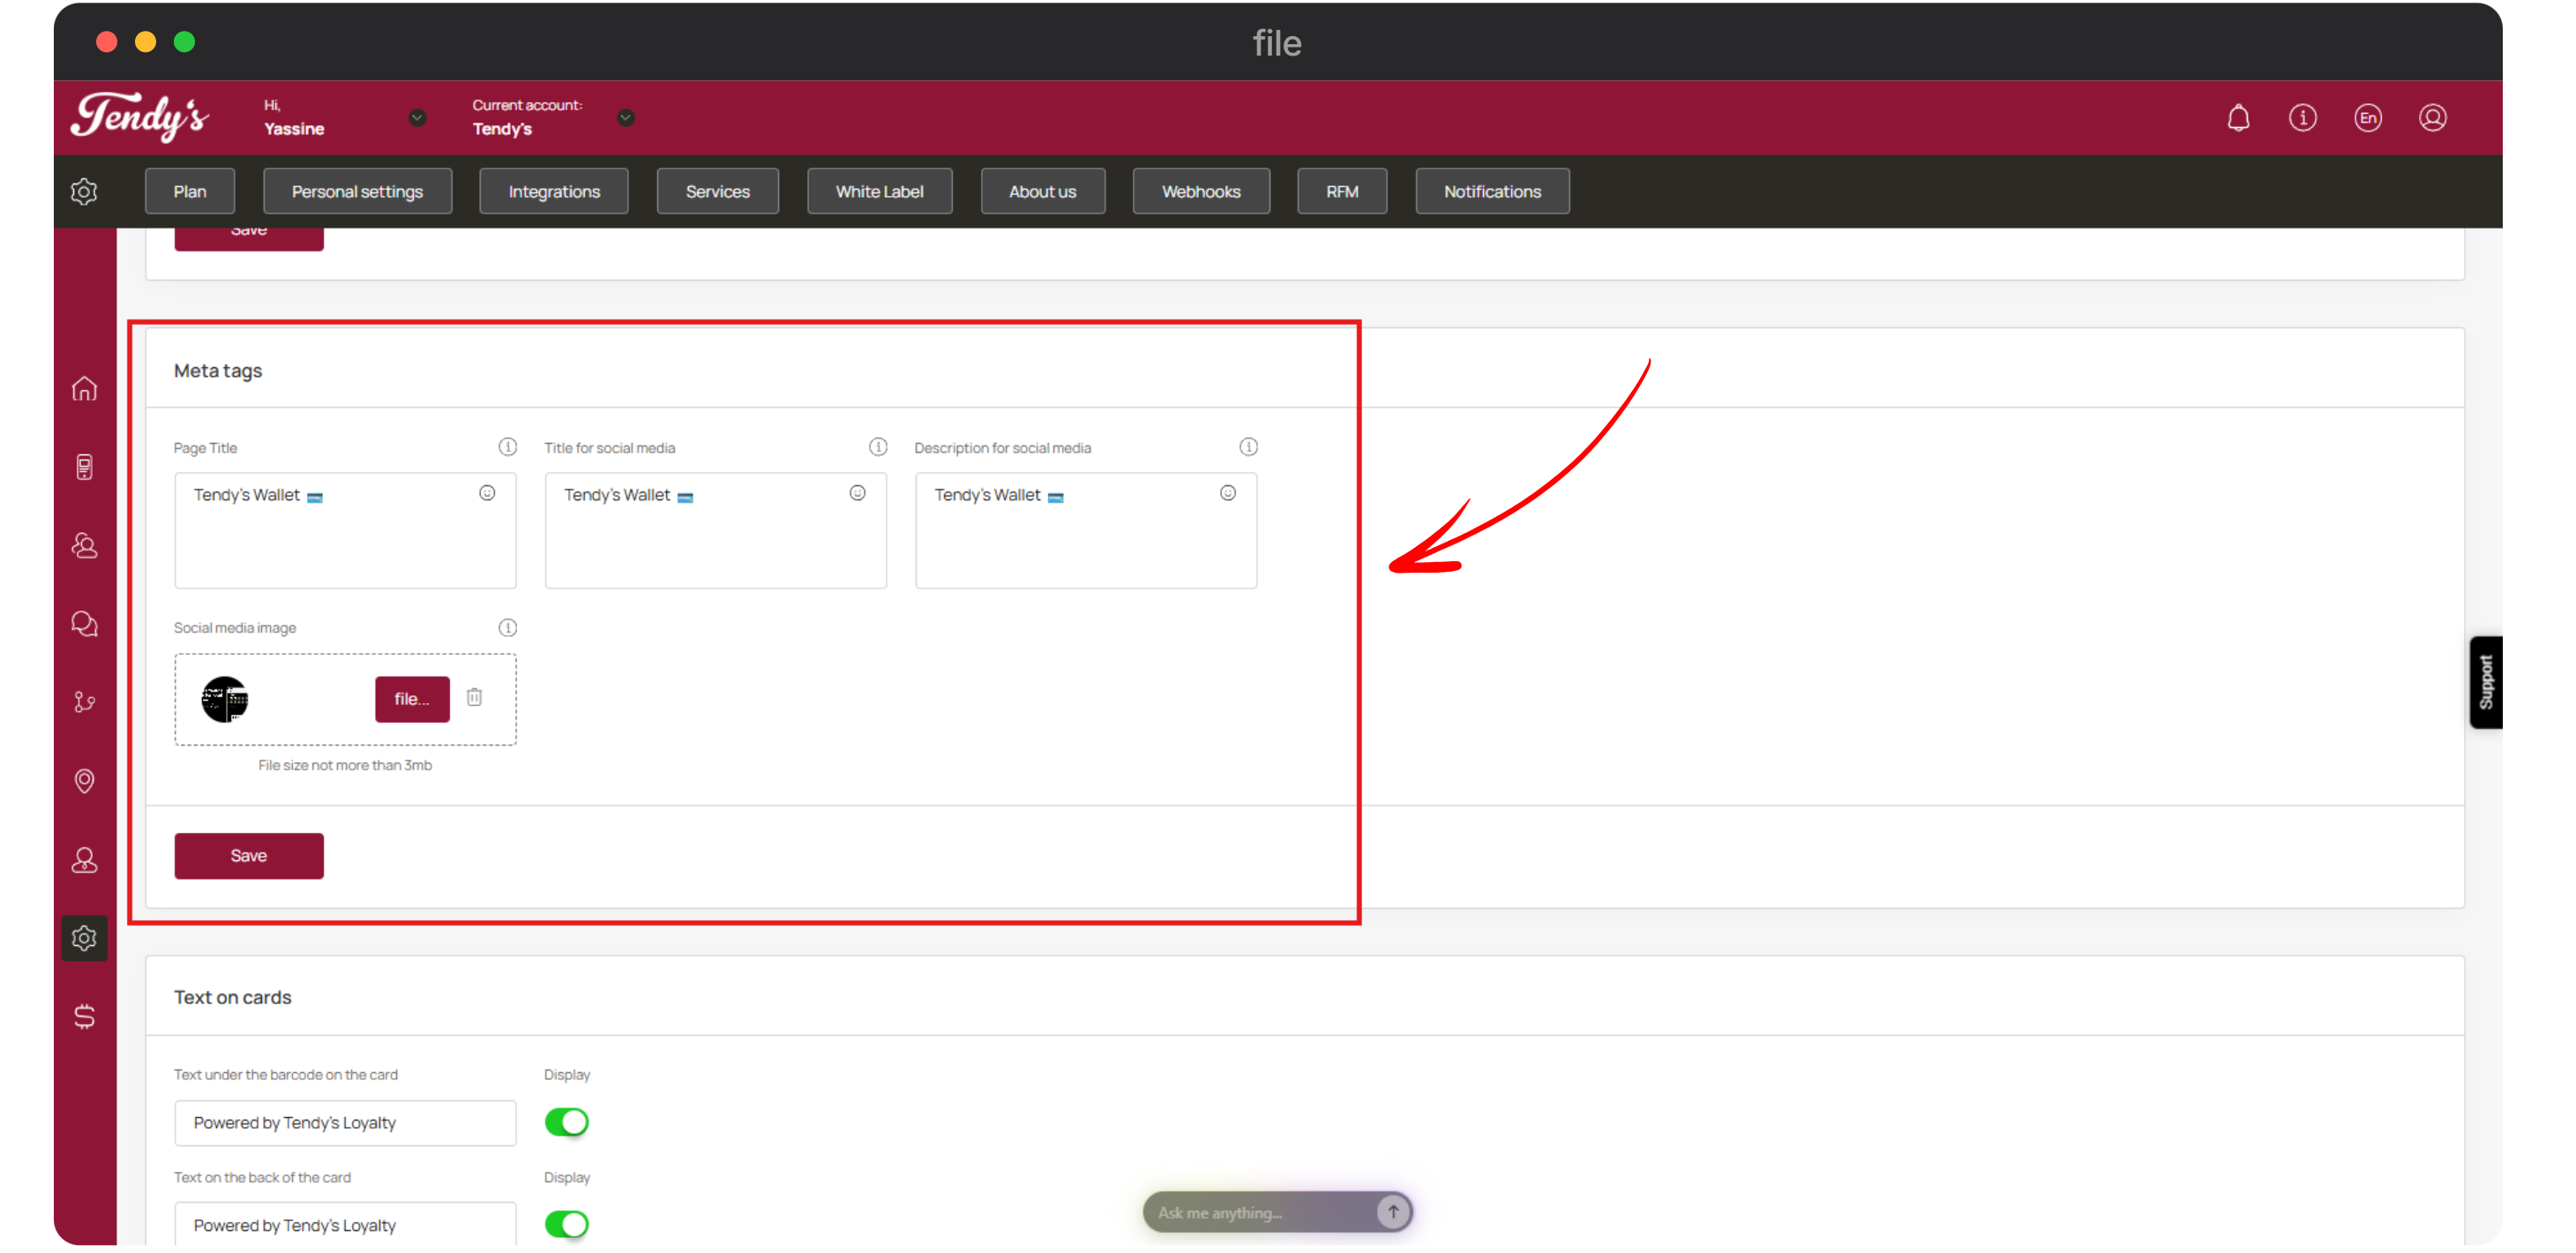
Scrolling down further, you can see the Meta tags section. Here, use the Page Title, Title for social media, Description for social media, and social media image tab to make the respective selections. Once the selections are made, click the Save button.
Be sure to make this setting, otherwise the TRYB Loyalty brand will be displayed
Meta Tags
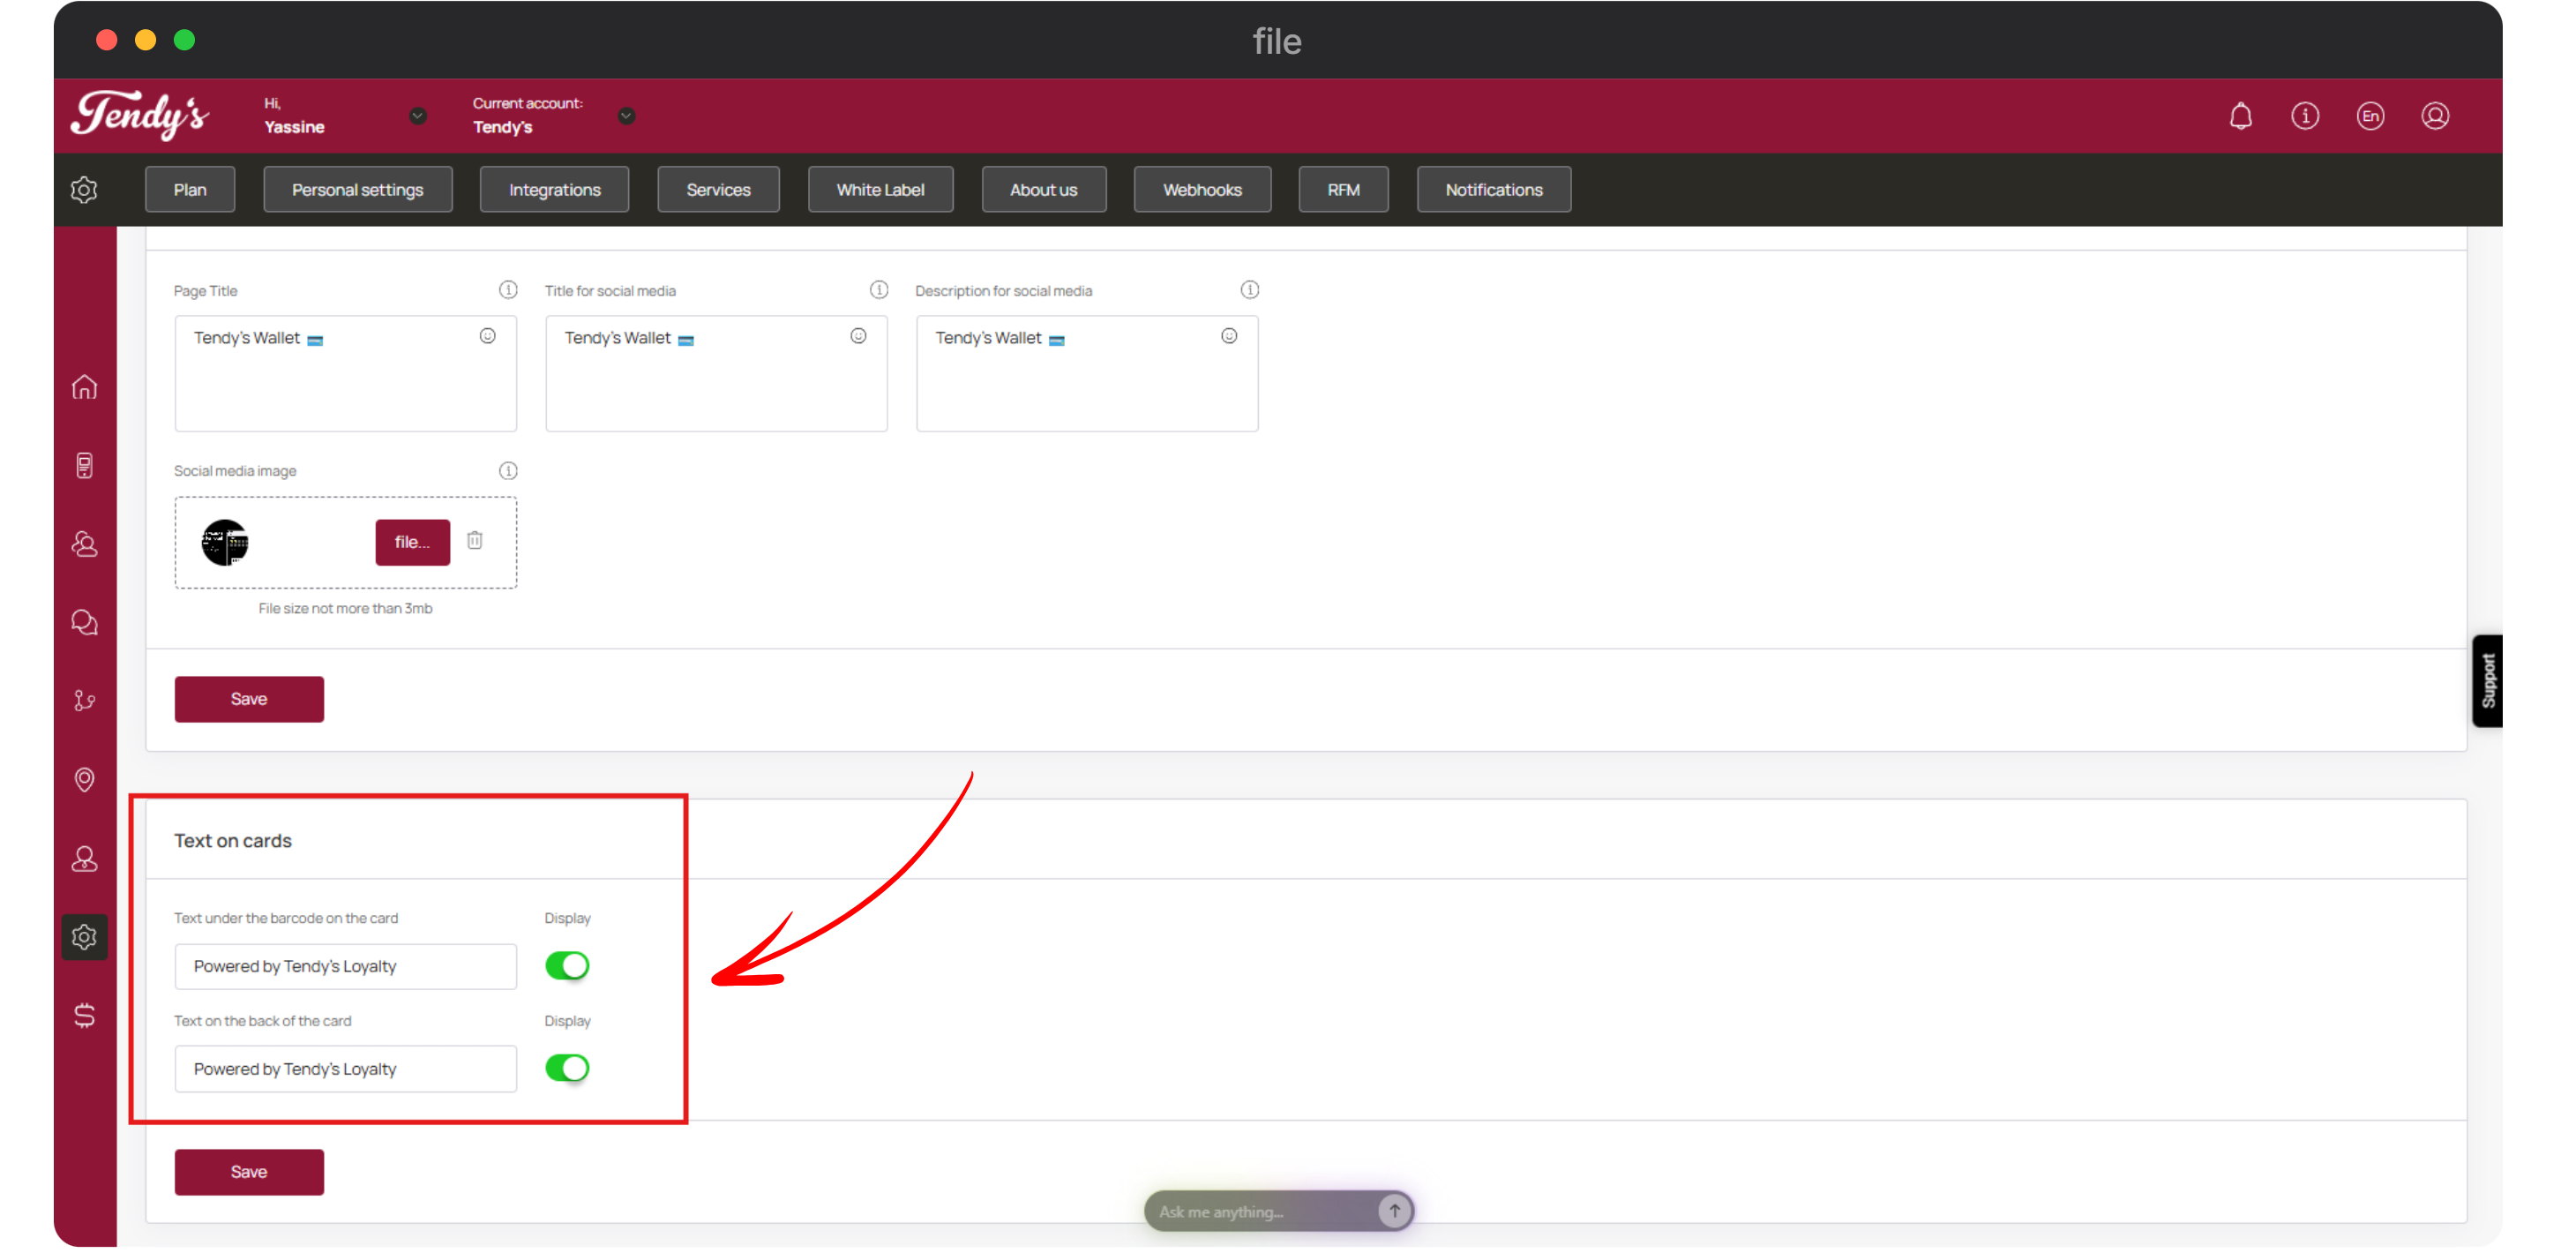
Towards the end of the page is the Text on Cards section.
Text under the barcode → Enter the text you want to display below the barcode on the card. 👉 If you don’t want to display anything, disable the Display toggle.
Text on the back of the card → Enter the text you want to display on the back of the card. 👉 If you don’t want to display anything, disable the Display toggle.
Once the selections are made, click Save.
✅Note: If you want to change or remove the “Powered by” text later, you can do this in your agency account under White Label → Branding.
The updated text will apply to both new and existing cards and sub-accounts.
👉 On already installed cards, the change becomes visible once the card refreshes (for example, after a transaction or a PUSH notification).
Note: If you want to change or remove the “Powered by” text later, you can do this in your agency account under White Label → Branding.
In this section, you can set the branding of your scanner app. To provide a better experience, a mobile screen preview of the app is also displayed on the right side.
To access the scanner app branding section, click Scanner Branding from the buttons displayed at the top-right corner.
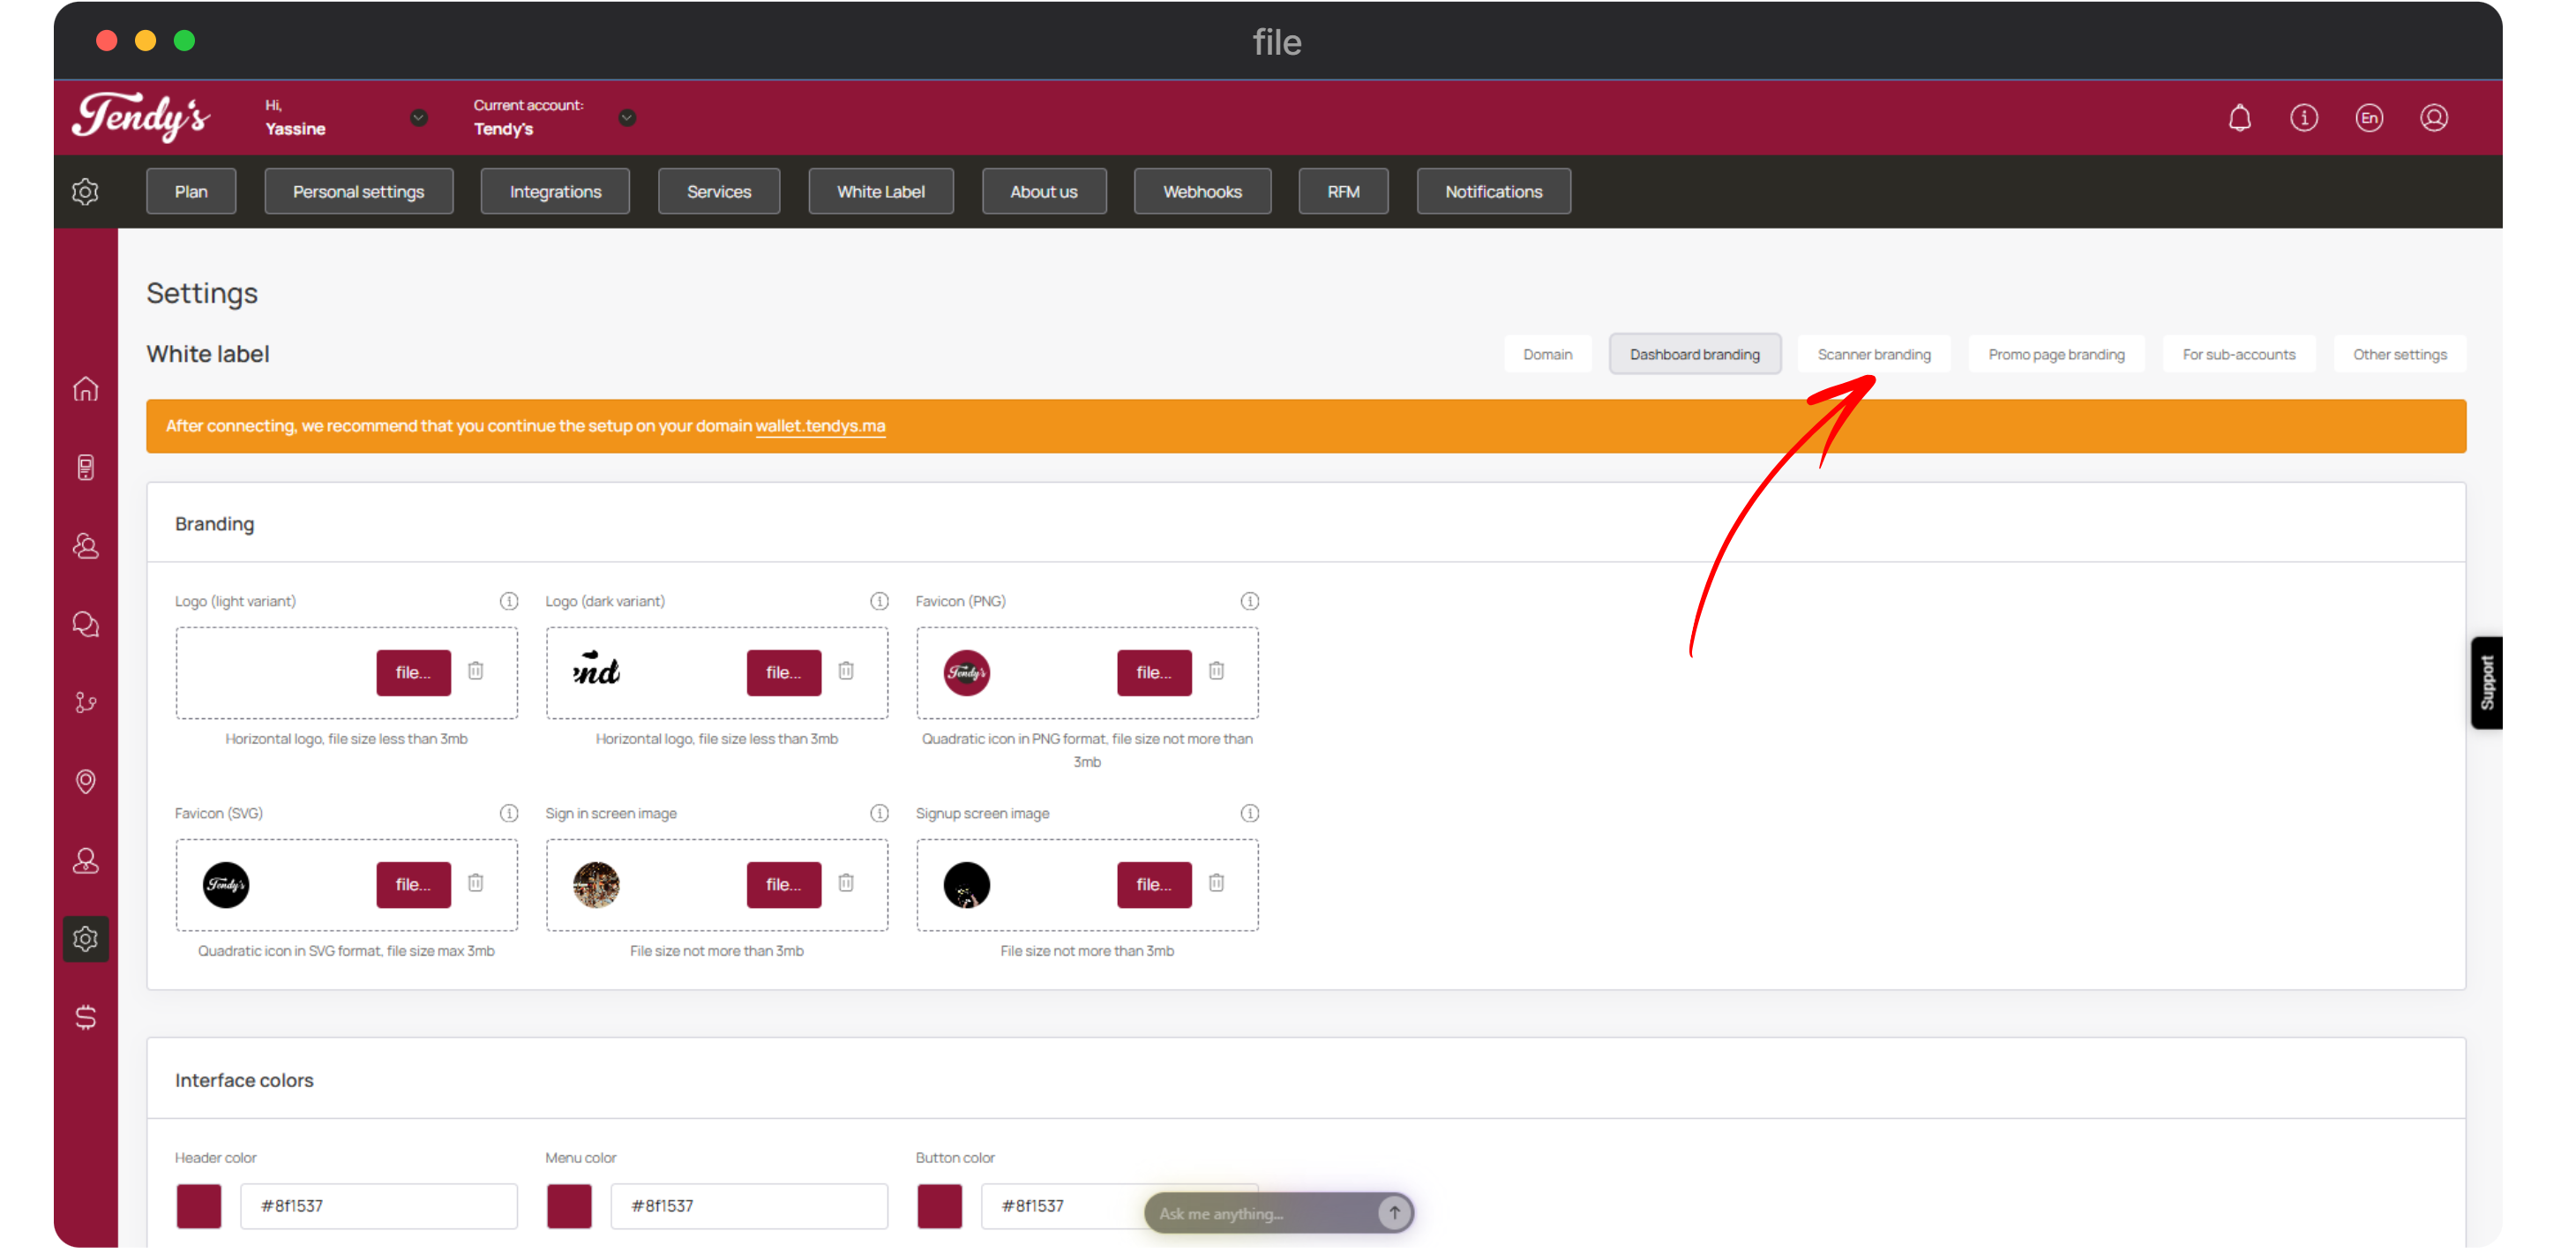
App Branding
This section starts off with the Images heading. Here, click the File button from the App icon tile to choose an icon for the app.
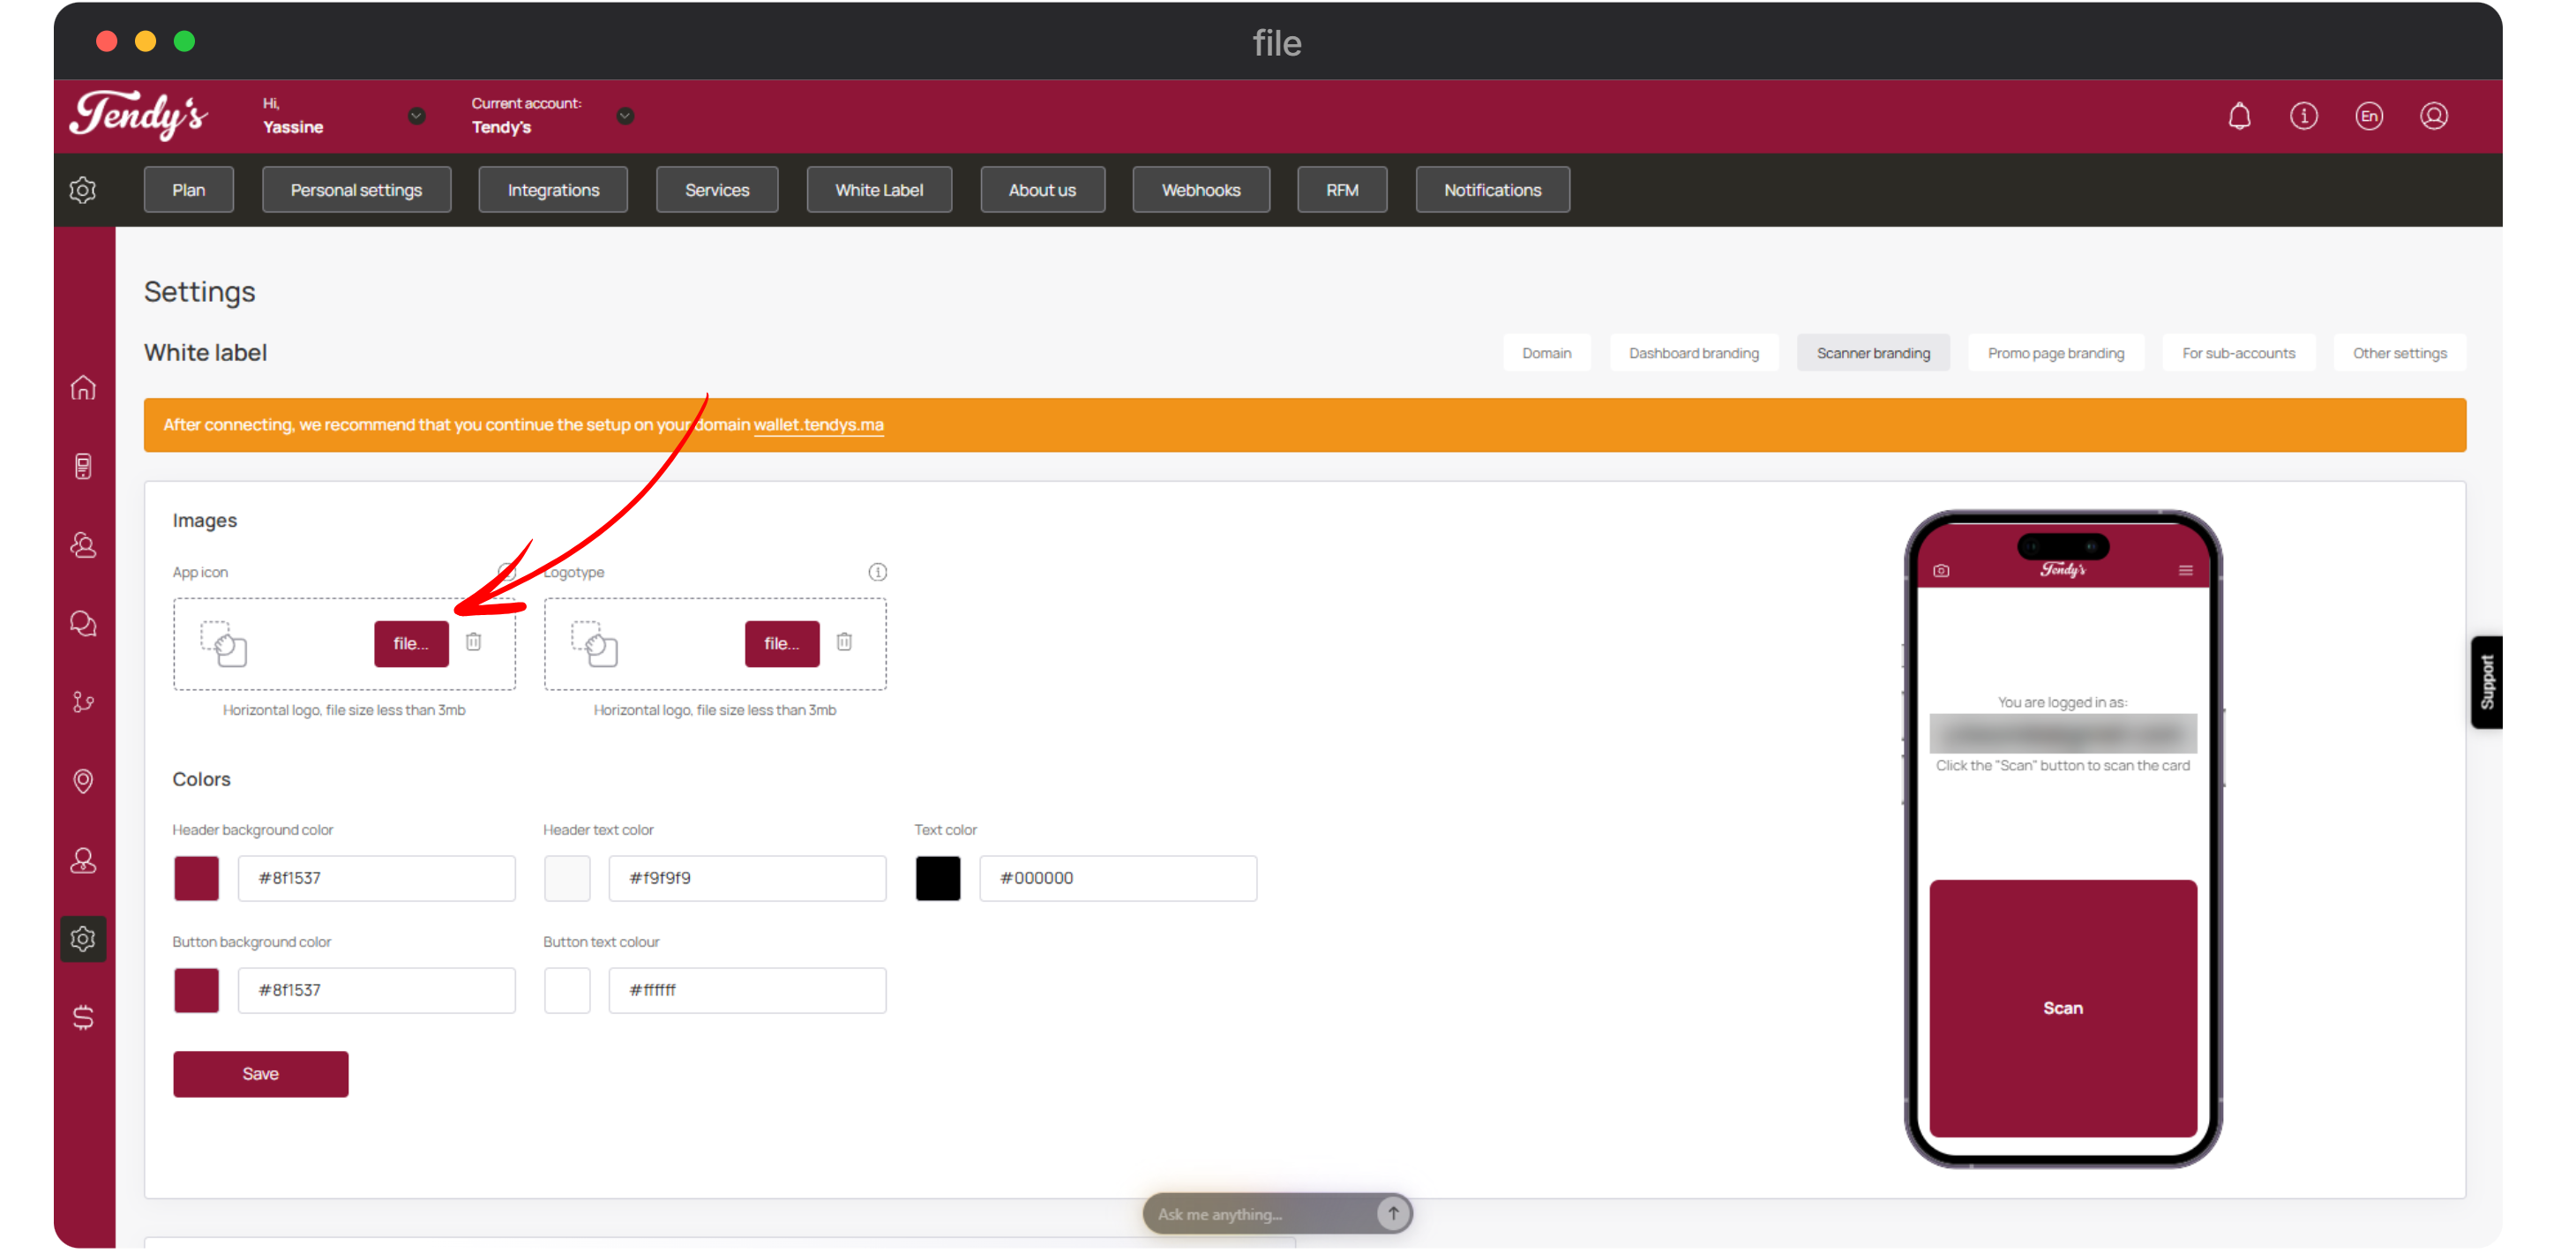
App Icon
Similarly, click the File button from the Logo type tile to choose a logo to be displayed at the top of the app screen.

Logo Type
Moving on to the Colors heading, use the color pickers under this heading to choose the Header background color, Header text color, Text color, Button background color, and Button text color.
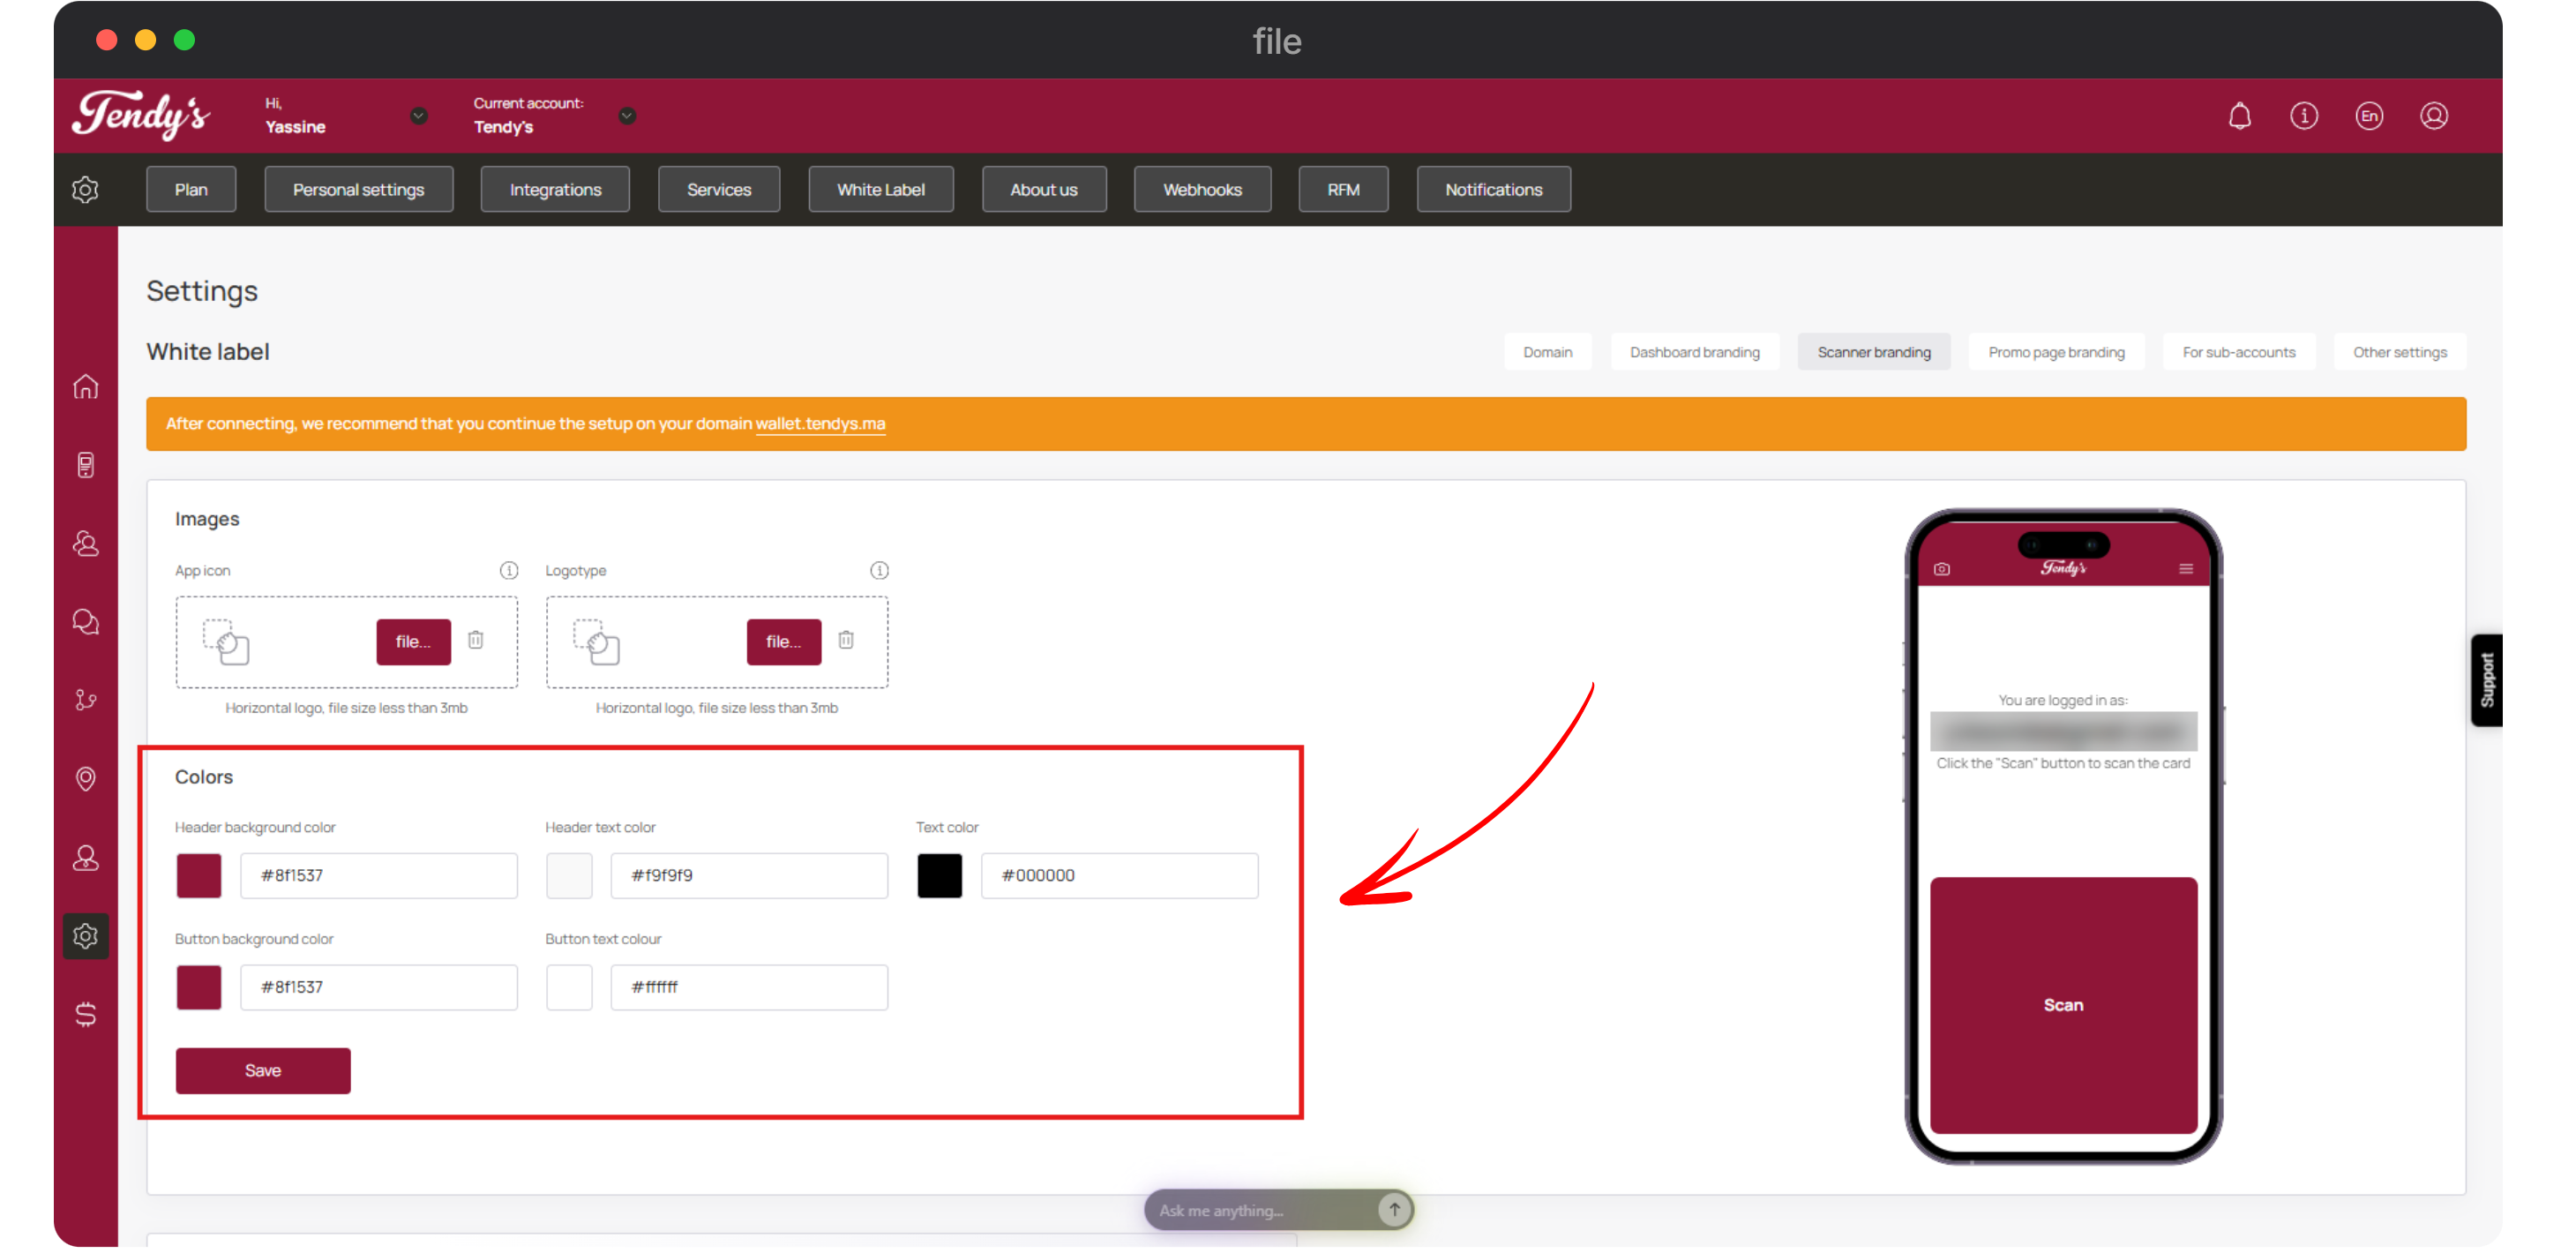
Colors
At the end of this page, you will find the Scanner App heading. Here, you can click the Open button to open the scanner app. After opening the scanner app, you can click on the install button to install it or copy the link to send to your other devices for installation.